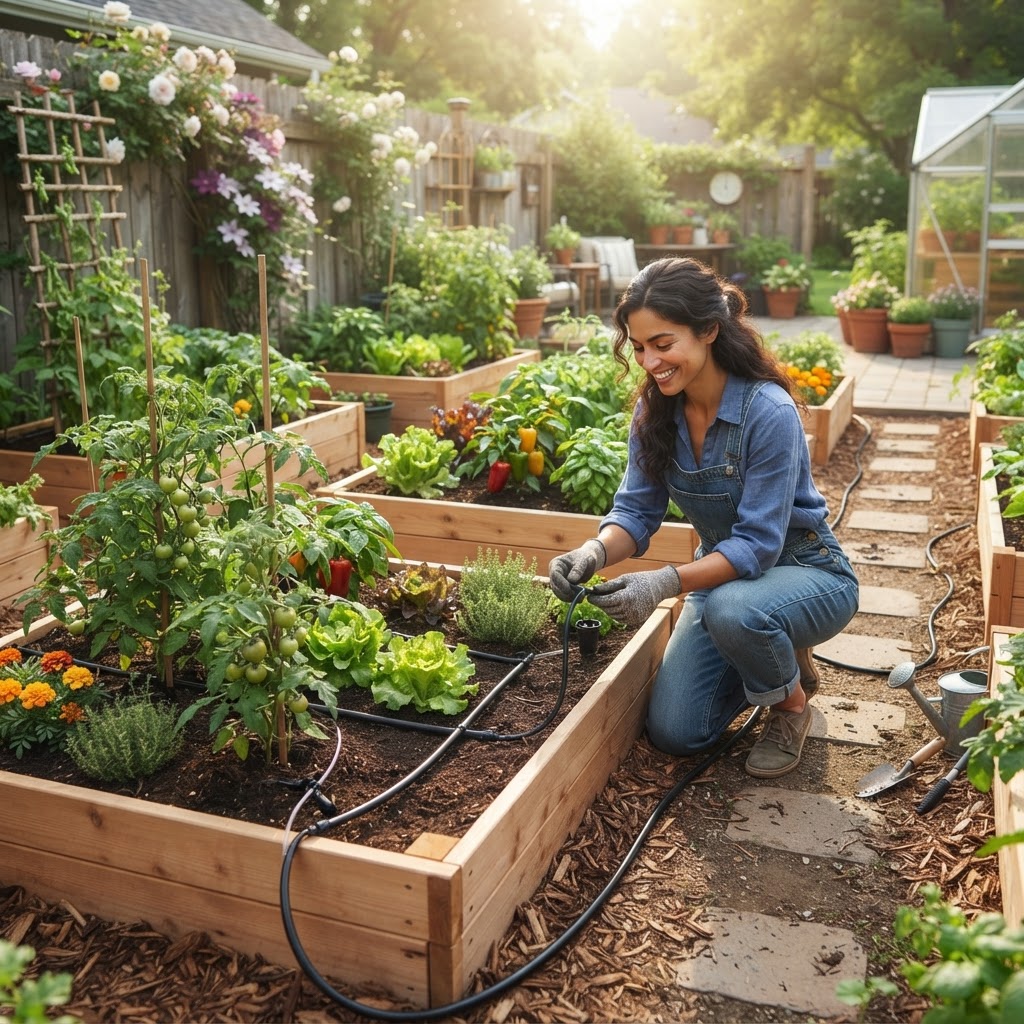
Best Drip Irrigation Kit for Raised Beds: A Beginner-Friendly Buying and Setup Guide
If you are tired of dragging hoses across the yard or wondering whether your raised beds got enough water, a drip irrigation kit can make gardening much easier. The best drip irrigation kit for raised beds is one that fits your bed size, is simple to install, and delivers steady, efficient watering right where your plants need it.
Why This Topic Matters
Raised beds dry out faster than in-ground gardens, especially in hot, windy, or sunny spots. Because the soil level is elevated and often filled with loose, rich growing mix, moisture can disappear quickly.
That can be hard on beginner gardeners. One missed watering on a hot day can stress lettuce, tomatoes, peppers, beans, and herbs before you even notice what happened.
Drip irrigation solves a lot of common watering problems. Instead of spraying leaves and paths, it delivers water slowly at the soil level, which helps reduce waste and supports stronger root growth.
It also saves time. Once your system is set up, watering becomes more consistent and much less of a daily chore.
For many home gardeners, the right kit also makes it easier to leave town for a weekend without worrying that everything will wilt. That peace of mind alone can make a drip system worth it.
Quick Answer
The best drip irrigation kit for raised beds is usually a simple, expandable kit that includes:
- 1/2-inch main tubing
- 1/4-inch feeder tubing
- Drip emitters or adjustable micro-emitters
- Barbed fittings and connectors
- End caps
- A pressure regulator
- A filter
- An optional timer
For most beginners, the best choice is not the biggest kit or the most expensive one. It is the kit that matches the number and size of your raised beds and can be adjusted as your garden changes.
A good raised bed drip kit should be easy to customize. It should let you run a main line along or between beds, then branch small tubing to each plant row or grid.
If you grow a mix of vegetables, look for kits that support both drip lines and individual emitters. That gives you flexibility for closely spaced crops like carrots and lettuce, as well as larger plants like tomatoes, cucumbers, and zucchini.
Step-by-Step Guide
1. Start by measuring your raised beds
Before buying anything, measure the length, width, and number of beds you want to irrigate. Also measure the distance from your outdoor faucet to the garden.
This tells you how much main tubing and feeder tubing you need. It also helps you avoid buying a kit that is too small or much larger than necessary.
Write down:
- Number of beds
- Bed dimensions
- Distance from spigot to first bed
- Distance between beds
- Types of vegetables you are growing
2. Decide how water should be delivered
Raised beds can be watered with either drip lines or individual emitters. Both work well, but each suits different planting styles.
Drip line is great for:
- Square-foot gardening
- Tight plant spacing
- Salad greens
- Root crops
- Beans
- Onions
Individual emitters are great for:
- Tomatoes
- Peppers
- Eggplant
- Cucumbers
- Squash
- Larger herbs
Many gardeners use a combination of both. For example, you might use drip line in one bed of lettuce and onions, then use individual emitters for tomato plants in another bed.
3. Look for the most important kit features
When comparing drip irrigation kits, focus on practical features instead of marketing language. A beginner-friendly kit should be reliable, simple, and easy to expand.
Here is what matters most.
Pressure regulator
Most household water pressure is too high for drip systems. A pressure regulator keeps water flowing at a safe, steady pressure so fittings do not pop off and emitters work properly.
Filter
A filter helps keep dirt, grit, and small debris from clogging emitters. This is especially important if your water source is from a well or if outdoor faucets sometimes release sediment.
Easy connectors
Push-fit or barbed fittings should be sturdy but manageable for beginners. If reviews repeatedly mention leaking connectors or cracked fittings, that is a warning sign.
Expandability
Gardens change over time. You may add another raised bed next season, move plants around, or decide to include containers nearby.
A good kit should make that easy. Extra connectors, tees, end caps, and tubing options are very helpful.
Compatibility with a timer
A timer is not always included in a kit, but it is one of the best upgrades you can add. It makes watering more consistent and reduces the risk of forgetting during hot weather.
4. Match the kit to your garden layout
The best drip irrigation kit for raised beds depends a lot on how your garden is arranged.
If you have one or two small beds, a compact starter kit may be enough. These usually work well for a simple layout and are often less intimidating to install.
If you have several larger beds, choose a more expandable kit with a generous amount of 1/2-inch tubing. That larger main line helps distribute water across the whole system.
If your beds are spread far apart, check whether the kit includes enough tubing to bridge those distances. The kit might be good quality but still not fit your setup without add-on parts.
5. Think about your crops
Different vegetables have different watering needs. This does not mean you need a complicated system, but it does mean flexibility is useful.
For example:
- Tomatoes like deep, consistent watering
- Lettuce prefers evenly moist soil
- Peppers dislike dramatic swings from dry to soaked
- Cucumbers need regular moisture for steady growth
- Herbs often need less water than thirsty fruiting plants
If all your beds are planted the same way, one simple pattern may work. If you grow a mix of crops, choose a kit that lets you place emitters where they make the most sense.
6. Plan a simple layout before installation
Sketch your beds on paper. Mark where the faucet is, where the main line will run, and where each branch line will go.
This step prevents frustration. It also helps you estimate how many tees, elbows, and end caps you need.
For most raised beds, one of these layouts works best:
Grid layout
A grid works well in rectangular raised beds with evenly spaced crops. You run 1/4-inch tubing in parallel lines across the bed so water is distributed evenly.
Perimeter with branches
This layout runs a line around the bed edge, then branches inward to larger plants. It is useful when you want flexibility and easy access for planting.
Straight rows
If you plant in neat rows, simple straight drip lines may be enough. This is often the easiest layout for beginners.
7. Install the system in the right order
A typical setup at the spigot goes like this:
- Faucet
- Timer, if using one
- Backflow preventer, if included or required
- Filter
- Pressure regulator
- Main tubing
From there, the main tubing runs toward the raised beds. Then you connect feeder tubing, drip lines, or emitters based on your layout.
Anchor the tubing with garden staples so it stays in place. Keep lines neat and avoid sharp kinks.
8. Test the system before burying or covering tubing
Turn the water on slowly and inspect each connection. Check for leaks, popped fittings, and uneven flow.
This is the time to make adjustments. It is much easier to fix a problem before mulch goes down.
Watch whether the water reaches all beds evenly. If one area seems weak, make sure the tubing is not kinked and the emitters are installed correctly.
9. Add mulch to improve results
Once the system is working, add a light layer of mulch around your vegetables. Straw, shredded leaves, or untreated grass clippings can all help reduce evaporation.
Mulch and drip irrigation work especially well together. The drip system keeps the root zone moist, and mulch helps that moisture last longer.
10. Adjust with the season
Your watering schedule should change through the year. Cool spring weather usually requires less frequent watering than the heat of midsummer.
Check the soil regularly by pressing a finger a couple of inches below the surface. If it feels dry there, it is time to water longer or more often.
Common Beginner Mistakes
Choosing a kit based only on price
A cheap kit is not a bargain if it cracks, leaks, or does not include the parts you actually need. It is better to buy a simple, dependable system than a large kit with poor-quality fittings.
Skipping the pressure regulator
Some beginners try to connect tubing directly to the faucet without proper pressure control. That often leads to blown connections and uneven watering.
Using the wrong watering layout
A single emitter for a whole raised bed usually is not enough. Raised beds need even coverage, especially when plants are spaced closely.
Forgetting to use a filter
Clogged emitters are a common headache. A filter helps prevent many of those problems before they start.
Watering too often and too shallowly
Drip irrigation is efficient, but it still needs the right schedule. Tiny daily sprinkles can leave roots shallow and the deeper soil dry.
Not checking the system regularly
Automatic does not mean maintenance-free. A disconnected line or clogged emitter can stress plants quickly in warm weather.
Expanding without a plan
Adding more beds to an existing system is common. But if you keep branching randomly without checking water flow and tubing length, performance can suffer.
Best Tips for Success
Keep the design simple
Start with the easiest layout that gives even coverage. You can always make the system more refined after one growing season.
Group plants with similar water needs
Try to plant thirsty vegetables together and drought-tolerant herbs in a separate area if possible. This makes your irrigation schedule more effective.
Use a timer for consistency
A timer helps avoid forgotten waterings and keeps moisture levels more stable. That is especially helpful for tomatoes, cucumbers, peppers, and greens.
Check soil, not just the schedule
Even with automation, use your hands and eyes. Soil moisture, plant appearance, weather, and mulch levels all affect how much water your beds actually need.
Flush the lines occasionally
Open the ends of the tubing once in a while and let water run through. This can help clear sediment before it causes clogs.
Reinspect at the start of each season
Tubing and fittings can shift over winter. Before planting season gets busy, run the system and make sure everything still works.
Secure tubing well
Staples or stakes keep tubing from shifting while you weed, harvest, or replant. A tidy system is easier to maintain.
Recommended Supplies or Tools
You do not need a huge tool collection to install a drip system. A few basics will make setup much easier.
Recommended supplies include:
- A drip irrigation kit sized for your raised beds
- Outdoor faucet timer
- Pressure regulator
- Filter
- Backflow preventer if needed
- Extra 1/2-inch tubing
- Extra 1/4-inch tubing
- Tees, elbows, and end caps
- Tubing stakes or landscape staples
- Hole punch made for drip tubing
- Mulch for moisture retention
Helpful tools:
- Measuring tape
- Garden scissors or pruners for cutting tubing
- Marker for planning lines
- Notebook or sketch paper
If you are shopping online, read the product details carefully. Look for the total tubing length, included fittings, emitter type, and whether the kit is intended for containers, rows, or larger garden beds.
It is also smart to read reviews from gardeners with layouts similar to yours. A kit that works beautifully for patio pots may not be the best option for several 4-by-8 raised beds.
Frequently Asked Questions
What size drip irrigation kit do I need for raised beds?
Choose a kit based on the number of beds, their dimensions, and the distance from your water source. For one or two small raised beds, a starter kit may be enough. For multiple larger beds, an expandable kit with more main tubing is usually the better choice.
Is drip irrigation better than a soaker hose for raised beds?
Drip irrigation is often the better long-term choice because it is more precise and easier to customize. Soaker hoses can work, but drip systems usually give more control over layout, water delivery, and future expansion.
How often should I run drip irrigation in raised beds?
That depends on weather, soil mix, crop type, and mulch. In general, it is better to water deeply and consistently rather than giving short, shallow waterings every day. Always check the soil before deciding on a schedule.
Can I use one drip kit for vegetables and herbs together?
Yes, but it works best if their watering needs are somewhat similar. If herbs that prefer drier soil are mixed with thirsty vegetables, you may need adjustable emitters or separate zones.
Do I need a timer for a raised bed drip system?
No, but it is very helpful. A timer makes watering more consistent, saves time, and is especially useful during hot weather or when you are away from home.
Final Thoughts
The best drip irrigation kit for raised beds is the one that matches your garden size, your crop mix, and your comfort level with setup. For beginners, simple and expandable is usually the sweet spot.
Focus on the basics: a kit with quality tubing, dependable fittings, a pressure regulator, and a filter. Then create a layout that gives even moisture to your beds without making the system more complicated than it needs to be.
Once installed, drip irrigation can take a lot of stress out of vegetable gardening. Your plants get steadier moisture, you spend less time watering by hand, and your raised beds become easier to manage through the whole growing season.