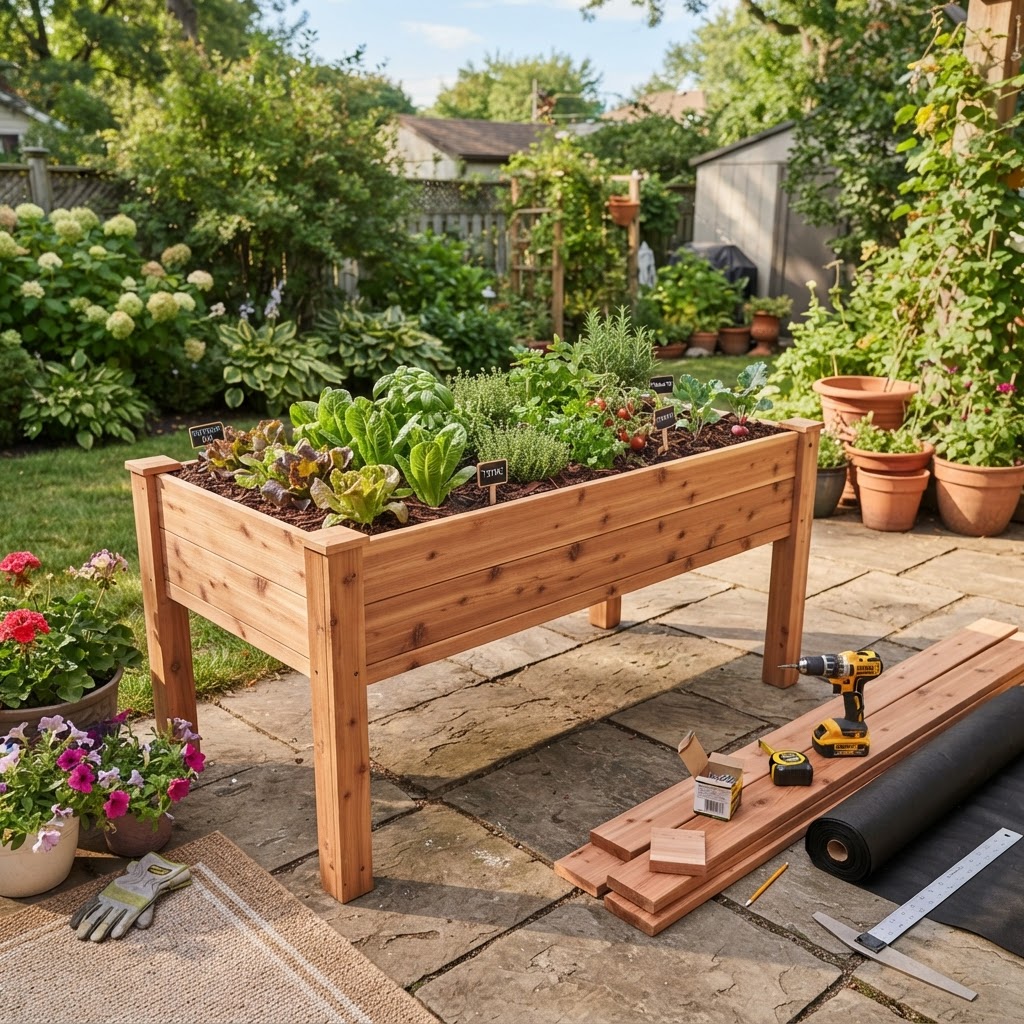
How to Build a Raised Bed With Legs: A Beginner-Friendly DIY Guide
If you want a vegetable garden that is easier on your back, simple to maintain, and tidy enough for a patio or small yard, a raised bed with legs is a great project to try. It gives you the benefits of raised bed gardening in a more accessible format, and you do not need advanced carpentry skills to make one.
This guide will walk you through how to build a raised bed with legs step by step. You will learn what materials to use, how big to make it, and how to avoid common beginner mistakes so your planter stays strong and productive.
Why This Topic Matters
A raised bed with legs is more than just a stylish planter. For many home gardeners, it solves real problems that make growing vegetables feel easier and more manageable.
First, it reduces bending and kneeling. That makes planting, watering, and harvesting much more comfortable, especially for older gardeners or anyone with back or knee pain.
Second, it works well in small spaces. If you garden on a deck, balcony, patio, or compact backyard, a legged raised bed can fit where a standard in-ground garden will not.
Third, it gives you better control over soil quality and drainage. You can fill the bed with a rich growing mix instead of trying to improve poor native soil.
It can also help keep some pests away. While it will not make your garden pest-proof, lifting the bed off the ground can discourage a few crawling insects and make it harder for weeds to invade from below.
For beginners, this style of bed is especially appealing because it feels organized and approachable. A contained growing space is less overwhelming than a large garden plot, and that can make it easier to stick with gardening long enough to enjoy success.
Quick Answer
To build a raised bed with legs, make a shallow wooden planting box from rot-resistant lumber, attach four sturdy legs, add support braces, line the inside with landscape fabric, drill drainage holes, and fill it with lightweight raised bed soil. A common beginner-friendly size is about 4 feet long, 2 feet wide, and 10 to 12 inches deep, with the top of the bed standing 30 to 36 inches off the ground.
The simplest design uses:
- Cedar or untreated rot-resistant wood
- Exterior-grade screws
- Four strong legs made from 2x2 or 2x4 lumber
- Bottom slats or a supported base
- Drainage holes
- Landscape fabric
- A lightweight soil mix
If you can measure, drill, and drive screws, you can build one.
Step-by-Step Guide
1. Choose the Right Size
Before buying materials, think about where your raised bed will sit and what you want to grow.
A good beginner size is 48 inches long by 24 inches wide. This is large enough for salad greens, herbs, radishes, bush beans, peppers, or even a compact tomato, but still manageable in weight and cost.
For depth, aim for 10 to 12 inches of soil for most leafy greens, herbs, and many compact vegetables. If you want to grow larger root crops or bigger fruiting plants, a little extra depth can help.
For height, many gardeners prefer the top rim of the bed to be around waist level, roughly 30 to 36 inches from the ground. That height is comfortable for planting and harvesting.
2. Pick Safe, Durable Materials
The best wood for this project is cedar or another naturally rot-resistant untreated wood. It holds up well outdoors and is widely used in edible gardens.
Avoid pressure-treated wood if you prefer the most cautious option for growing food, especially in a beginner project. Many modern treated woods are considered safer than older formulas, but plenty of gardeners still choose untreated cedar for peace of mind.
You will also want exterior-grade screws so the structure stays secure through rain and seasonal changes.
3. Gather Your Supplies
For a basic 4-by-2-foot raised bed with legs, you will need:
- Two boards cut to 48 inches for the long sides
- Two boards cut to 21 inches for the short sides, adjusted for board thickness
- Four legs, usually 30 to 36 inches long
- Support boards for the bottom frame
- Bottom slats or boards to hold the soil
- Cross braces for stability
- Exterior wood screws
- Drill and drill bits
- Saw if you are cutting lumber yourself
- Measuring tape
- Pencil
- Level
- Sandpaper
- Landscape fabric or heavy-duty garden fabric
If you do not want to make all the cuts yourself, many home improvement stores will cut lumber for you.
4. Build the Planting Box
Start by assembling the rectangular box that will hold the soil.
Lay out the two long boards and two short boards into a rectangle. Drill pilot holes first to reduce splitting, then screw the corners together.
Check that the frame is square before tightening everything fully. If one corner looks off, adjust it now. A square frame will make the rest of the build much easier.
If you want a deeper bed, you can stack a second layer of boards on top. Just remember that more depth means more soil and more weight.
5. Add a Strong Bottom Support
A raised bed with legs needs a base that supports soil while still allowing drainage. This is one of the most important parts of the build.
Attach support boards along the inside lower edges of the box. These cleats will hold the bottom slats in place.
Then install wooden slats across the bottom with small gaps between them. The gaps let excess water escape, which helps prevent soggy roots.
Another option is to use a solid wood bottom and drill several drainage holes across it. This can work well, but make sure there are enough holes and that the wood is well supported.
6. Attach the Legs
Turn the box upside down or set it on a stable work surface. Position one leg at each corner.
For the strongest result, place the legs inside the corners of the box rather than simply screwing them to the outside. This gives better support and reduces wobbling.
Drive multiple screws through each side of the box into the leg. Use at least two screws per side for a more secure hold.
If your bed will be taller or longer, 2x4 legs will usually feel sturdier than 2x2 legs.
7. Add Cross Bracing
This step matters more than many beginners realize. Soil is heavy, and a filled bed can become unstable if the legs are not braced.
Install horizontal braces between the legs on the long sides. You can also add a lower shelf frame, which doubles as storage and improves structural strength.
For even more stability, attach diagonal corner braces near the top or bottom of the legs. These small supports can make a big difference.
8. Sand Rough Edges
Before lining or filling the bed, sand rough spots and sharp corners.
This makes the bed safer to use and reduces splinters. Pay special attention to the top rim, since your hands will touch that area often.
9. Line the Interior
Staple landscape fabric inside the bed over the bottom slats and up the sides.
This helps keep soil from washing out through gaps while still allowing water to drain. Do not use non-breathable plastic, since it can trap water and create drainage problems.
Keep the fabric smooth but not stretched too tightly. You want it to settle naturally once soil is added.
10. Drill or Confirm Drainage
If your bottom uses slats with small gaps, you may already have enough drainage. If you used a more solid base, drill plenty of holes before adding fabric and soil.
Good drainage is essential in a raised bed with legs because containers dry and drain differently than in-ground beds. Without drainage, roots can rot quickly.
11. Move the Bed Into Place Before Filling
This is easy to overlook.
Once the bed is filled with soil, it will be much heavier than you expect. Set it in its final location first, making sure it gets the right amount of sunlight for the crops you want to grow.
Most vegetables need at least 6 to 8 hours of direct sun per day.
12. Fill With the Right Soil Mix
Do not fill the bed with dense garden soil scooped from the yard. In a legged raised bed, that can become too heavy and may drain poorly.
Instead, use a lightweight, fertile mix designed for raised beds or containers. A simple DIY blend can include:
- 50% high-quality compost
- 30% coconut coir or peat moss
- 20% perlite or coarse vermiculite
This kind of mix stays airy, drains well, and supports healthy root growth.
13. Plant Smart for the Space
A raised bed with legs usually has less root space than a full-size in-ground bed, so choose crops carefully.
Great options include:
- Lettuce
- Spinach
- Arugula
- Basil
- Parsley
- Cilantro
- Chives
- Radishes
- Green onions
- Bush beans
- Compact peppers
- Patio tomatoes with support
Avoid trying to overcrowd the bed. Fewer healthy plants will perform better than too many struggling ones.
14. Water Consistently
Legged beds often dry out faster than ground-level beds because air circulates around them. Check moisture regularly, especially in warm or windy weather.
Water deeply until you see water draining from the bottom. Then wait until the top inch of soil begins to dry before watering again, depending on the needs of your crops.
Common Beginner Mistakes
Using wood that is too thin
Thin boards may bow or crack under the weight of moist soil. Choose lumber sturdy enough for outdoor use, especially for the bottom and legs.
Skipping support braces
Many first-time builders focus on the box and forget the legs need reinforcement. Without braces, the bed can wobble or weaken over time.
Making the bed too deep or too large
Bigger is not always better. More size means more soil, more weight, and more stress on the frame.
For a first project, keep it modest and manageable.
Forgetting drainage
Poor drainage is one of the fastest ways to lose plants in any container-style garden. Always include bottom gaps or drainage holes.
Filling it with heavy soil
Soil from the yard often compacts and becomes too dense. A lighter raised bed mix is much better for root health and structural load.
Putting it in the wrong spot
A beautiful bed in deep shade will still struggle to grow tomatoes or peppers. Match your crops to your sunlight, or place the bed where it gets enough direct sun.
Best Tips for Success
Start with easy crops
If this is your first raised bed, plant fast and forgiving vegetables. Salad greens, herbs, and radishes give quick results and help build confidence.
Keep the width reachable
A 2-foot-wide bed is ideal for many beginners because you can comfortably reach the center from either side. That means less stretching and less accidental damage to plants.
Consider adding a lower shelf
A shelf between the legs is practical and structural. It gives you a place to store a watering can, hand trowel, pruners, or extra pots.
Use mulch on top of the soil
A light layer of straw, shredded leaves, or untreated fine mulch helps hold moisture and reduces splash when watering. This is especially useful in elevated beds that dry faster.
Refresh the soil seasonally
Each season, add a little compost to replace nutrients plants used up. Over time, soil in raised beds settles and benefits from regular improvement.
Check screws once or twice a year
Outdoor wood expands and contracts. Tightening hardware occasionally will help keep your bed safe and sturdy.
Think about watering before planting
If your bed is far from a hose, watering may become annoying fast. Place the bed where daily care feels easy.
Recommended Supplies or Tools
You do not need a workshop full of equipment to build a raised bed with legs. A simple set of beginner tools will usually do the job.
Helpful supplies and tools include:
- Cedar boards or other untreated rot-resistant lumber
- 2x2 or 2x4 boards for legs and braces
- Exterior-grade deck screws
- Power drill/driver
- Drill bits and pilot bit
- Measuring tape
- Carpenter's square
- Pencil
- Saw or pre-cut lumber
- Sandpaper or sanding block
- Staple gun
- Landscape fabric
- High-quality raised bed or container soil
- Compost
- Perlite or vermiculite
Optional but useful:
- Wood sealer rated as food-safe for exterior surfaces only
- Casters designed for heavy outdoor planters, if you want mobility
- A small trellis for peas or compact cucumbers
- Drip irrigation kit or self-watering insert
If you choose to link to tools or materials in your blog later, make sure any Amazon URLs use the full required format, such as https://www.amazon.com/dp/ASIN?tag=sustainablevegetablegardening-20.
Frequently Asked Questions
How deep should a raised bed with legs be?
For herbs, lettuce, spinach, and many compact vegetables, 10 to 12 inches is usually enough. If you want to grow larger crops like peppers or small tomatoes, 12 inches or a bit more is even better.
What wood is best for a raised bed with legs?
Cedar is one of the best choices because it is naturally rot-resistant and widely used for edible gardens. Other untreated rot-resistant woods can also work well.
Can a raised bed with legs hold a lot of weight?
Yes, if it is built correctly with sturdy lumber, strong screws, a supported bottom, and cross bracing. Wet soil is heavy, so strength and stability need to be part of the design from the start.
Do I need to line the bed with plastic?
No. Breathable landscape fabric is a better option because it holds soil in while still allowing drainage. Plastic can trap excess moisture and create root problems.
What vegetables grow best in a raised bed with legs?
Shallow- to medium-rooted crops are usually the easiest choice. Herbs, salad greens, radishes, bush beans, green onions, and compact pepper or tomato varieties often do very well.
Final Thoughts
Learning how to build a raised bed with legs is a practical way to make vegetable gardening more comfortable, accessible, and manageable. It is a project that looks impressive, but the basic build is simple enough for many beginners to tackle in a weekend.
Start with a modest size, use strong materials, do not skip the braces or drainage, and fill it with a light, healthy soil mix. Once your bed is built and planted, you will have a tidy growing space that is easier to care for and enjoyable to use every day.
If you are new to gardening, do not worry about making it perfect. A sturdy, functional bed that grows fresh herbs and vegetables is already a great success.