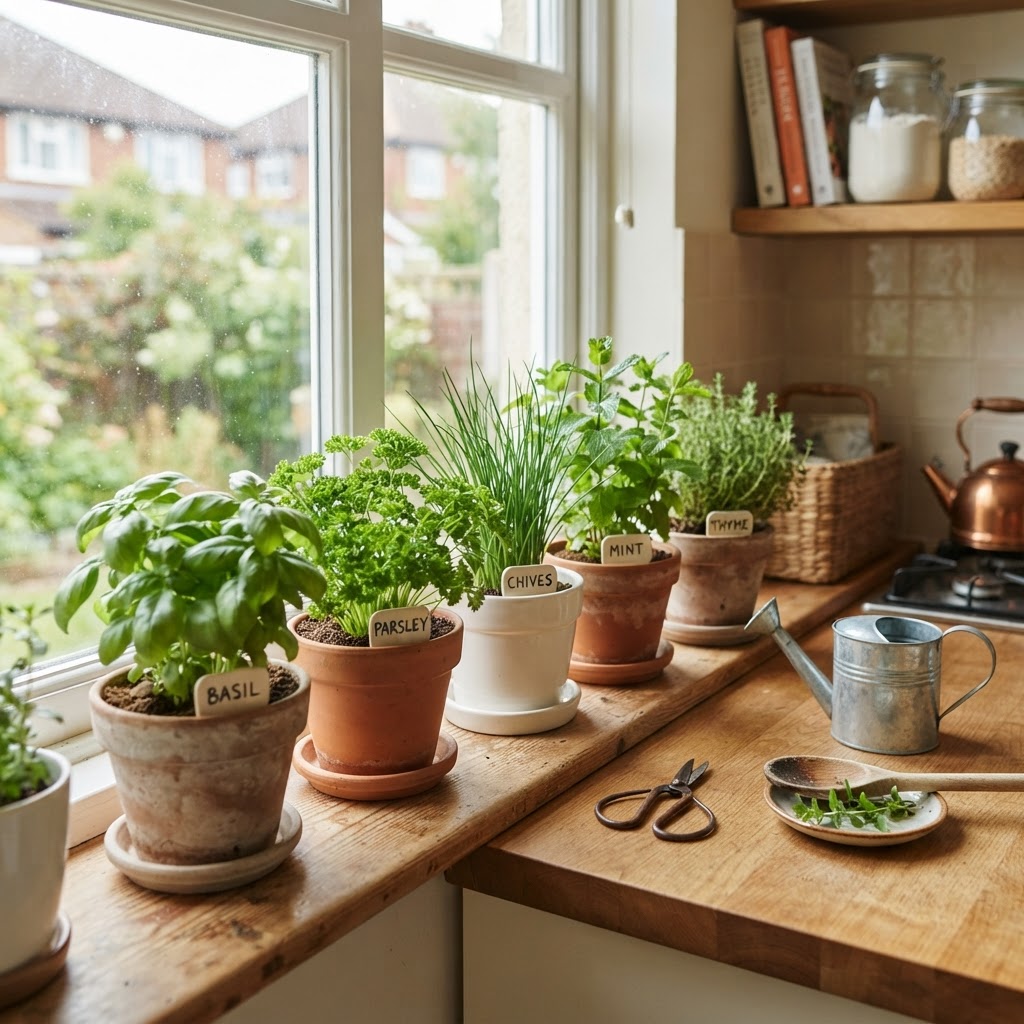
How to Grow Herbs in a Kitchen Window: A Beginner-Friendly Guide
Fresh herbs within arm’s reach can make everyday cooking feel easier, cheaper, and more enjoyable. If you have a sunny kitchen window, you already have a great place to start a small indoor herb garden.
Why This Topic Matters
Learning how to grow herbs in a kitchen window is one of the simplest ways to start gardening at home. Herbs are compact, useful, and forgiving enough for many beginners to grow successfully.
A small windowsill herb garden can help you save money on store-bought herbs that often wilt quickly in the fridge. It also reduces food waste because you can snip only what you need.
Growing herbs indoors brings a bit of greenery into your kitchen, especially during colder months when outdoor gardening slows down. For many new gardeners, it is a practical first step before trying larger vegetable crops.
Kitchen window herb gardening also helps you build important skills. You learn how light, watering, containers, and plant care work on a small scale.
Quick Answer
To grow herbs in a kitchen window, choose a window that gets at least 6 hours of bright light, plant easy herbs like basil, parsley, chives, mint, or thyme in pots with drainage, use a quality potting mix, and water only when the top inch of soil feels dry. Rotate pots every few days, harvest lightly and often, and add a grow light if your window does not provide enough sun.
If you want the easiest start, begin with 2 to 4 herbs instead of filling the whole windowsill at once. This makes it easier to watch how quickly the soil dries and how each plant responds to the light.
Step-by-Step Guide
1. Choose the best kitchen window
The right window makes a huge difference. Most herbs grow best in a south-facing window because it usually receives the strongest light indoors.
An east-facing window can also work well for herbs that like bright morning sun. West-facing windows may be useful too, though the light can be hotter in the afternoon.
North-facing windows are usually the hardest option for herbs because the light is often too weak. If that is the only window available, a small grow light can help a lot.
Look for a spot that gets:
- At least 6 hours of bright light daily
- Good airflow, but not constant cold drafts
- Enough room for pots without crowding
- Easy access for watering and harvesting
2. Pick beginner-friendly herbs
Some herbs handle indoor life better than others. Start with reliable, compact herbs that do not demand perfect conditions.
Great herbs for a kitchen window include:
- Chives: hardy, productive, and easy to snip often
- Parsley: useful in many dishes and fairly forgiving
- Mint: vigorous and easy, but best kept in its own pot
- Thyme: compact and well suited to containers
- Oregano: hardy and flavorful with enough light
- Basil: very popular, though it needs strong light and warmth
- Cilantro: possible indoors, but shorter-lived than some other herbs
If this is your first attempt, start with chives, parsley, thyme, and mint. Basil is wonderful, but beginners sometimes struggle with it if the window is not bright enough.
3. Decide between seeds, seedlings, or store-bought starter plants
You can begin herbs in a few different ways. Each option has pros and cons.
Seeds are inexpensive and give you more variety, but they take longer. They also need more patience at the start.
Seedlings or nursery starts are usually the easiest option for beginners. You get a healthy young plant and can harvest sooner.
Grocery store herb pots can work too, but they are often crowded with many plants packed tightly together. These usually do better if divided carefully and repotted.
4. Use the right containers
Herbs need containers with drainage holes. Without drainage, extra water sits around the roots and can quickly lead to root rot.
Choose pots that are large enough for the herb to grow, but not so large that the soil stays wet for too long. A pot that is 4 to 6 inches wide works for many starter herbs.
A few useful container tips:
- Always use pots with drainage holes
- Place a saucer or tray underneath to catch excess water
- Keep mint in its own container because it spreads aggressively
- Use slightly larger pots for basil and parsley as they grow
5. Fill pots with a quality potting mix
Do not use garden soil from outside in your indoor herb pots. It is usually too dense for containers and may bring in pests or diseases.
Instead, use a light, well-draining indoor potting mix. Herbs generally prefer soil that holds some moisture but still drains well.
If your potting mix feels heavy, you can improve drainage by mixing in a little perlite. This helps prevent soggy roots, which is a common indoor growing problem.
6. Plant your herbs correctly
If planting seeds, follow the depth instructions on the seed packet. Herb seeds are often small, so planting too deeply can reduce germination.
If transplanting seedlings, loosen the root ball gently and plant them at the same depth they were growing before. Press the soil lightly around the plant and water after planting.
Avoid crowding several different herbs into one tiny pot. It may look cute at first, but it often leads to poor airflow, uneven watering, and weaker growth.
7. Water the right way
Overwatering is one of the biggest reasons indoor herbs fail. Many beginners water on a schedule instead of checking the soil first.
Before watering, touch the top inch of soil with your finger. If it feels dry, water thoroughly until a little drains from the bottom. If it still feels damp, wait another day or two.
Keep these watering habits in mind:
- Check the soil before watering
- Water deeply, not just a tiny splash on top
- Empty saucers if water sits too long
- Reduce watering in lower light or cooler weather
Mediterranean herbs like thyme and oregano usually prefer slightly drier conditions than parsley or basil. Mint also likes consistent moisture, but not waterlogged soil.
8. Give herbs enough light
Even a bright kitchen can be dim for edible plants. Herbs need more direct light than many common houseplants.
If your herbs start getting leggy, pale, or slow-growing, insufficient light is often the cause. Try moving them to your sunniest window or adding a small LED grow light.
Signs your herbs need more light include:
- Long, thin stems
- Wide gaps between leaves
- Plants leaning strongly toward the glass
- Small or weak new growth
- Fading color and weaker flavor
9. Rotate and monitor your plants
Indoor plants naturally lean toward light. Turn your herb pots every few days so they grow more evenly.
At the same time, check for yellowing leaves, dry edges, pests, or soggy soil. Catching problems early is much easier than trying to rescue stressed plants later.
10. Feed lightly when needed
Herbs do not usually need heavy feeding, especially in fresh potting mix. Too much fertilizer can lead to soft, fast growth with weaker flavor.
If your herbs have been in the same pot for a while, use a diluted liquid fertilizer every 3 to 4 weeks during active growth. Follow the label directions and use less rather than more if you are unsure.
11. Harvest often and correctly
Regular harvesting helps many herbs become fuller and more productive. Snipping a little at a time is better than taking too much all at once.
Use clean scissors or herb snips and avoid removing more than one-third of the plant at one time. For basil, pinch just above a pair of leaves to encourage branching.
For most herbs:
- Harvest in small amounts, but regularly
- Remove flower buds on leafy herbs if you want continued leaf growth
- Cut from the outside first on clumping herbs like chives and parsley
- Do not strip a small plant bare
Common Beginner Mistakes
Many indoor herb problems come down to just a few simple issues. The good news is that they are easy to fix once you know what to watch for.
Not giving enough light
This is the most common problem. Herbs may survive in low light, but they usually will not thrive or produce flavorful growth.
Watering too often
Indoor pots dry more slowly than many people expect, especially in winter. Constantly wet soil can cause yellow leaves, fungus gnats, and root rot.
Using pots without drainage
Decorative containers can be tempting, but herbs need drainage. If you love a cachepot, keep the herb in a plain nursery pot inside it and remove it for watering.
Growing too many herbs at once
Starting with a full windowsill can feel exciting, but it can also get overwhelming. A small, manageable setup gives you a better chance of success.
Putting all herbs in the same pot
Different herbs often prefer slightly different moisture levels and root space. Keeping them in separate pots makes care much easier.
Ignoring temperature swings
A sunny window may heat up during the day and get chilly at night. Try to keep herbs away from freezing drafts, heater vents, or glass that becomes very cold.
Harvesting too aggressively
Tiny plants need time to establish. If you cut too much too soon, they may struggle to recover.
Best Tips for Success
If you want healthy herbs and steady harvests, keep your routine simple. Consistency matters more than perfection.
Here are some of the most helpful habits for beginners:
- Start with 2 to 4 easy herbs
- Choose the sunniest window in the house
- Use separate pots with drainage holes
- Check soil moisture with your finger before watering
- Rotate pots every few days
- Snip herbs often to encourage bushier growth
- Clean up dead leaves quickly to discourage pests
- Add a grow light if natural light is weak
Another smart tip is to match the herb to your cooking style. If you cook pasta often, try basil, parsley, thyme, and oregano. If you make tea or fresh drinks, mint may be your favorite windowsill herb.
It also helps to expect some trial and error. One herb may thrive while another struggles in the same window, and that is normal.
Recommended Supplies or Tools
You do not need fancy equipment to grow herbs in a kitchen window. A few practical basics are enough.
Useful supplies include:
- Small pots with drainage holes
- Saucers or trays
- Indoor potting mix
- Herb seeds or starter plants
- Small watering can or squeeze bottle
- Clean scissors or herb snips
- Diluted liquid fertilizer
- LED grow light for low-light kitchens
If you decide to shop online, look for simple, durable tools rather than oversized kits. For example, basic nursery pots, compact plant trays, and full-spectrum clip-on grow lights are often enough for a beginner setup.
When choosing tools, focus on function first. Good drainage, decent soil, and enough light matter much more than matching containers or decorative accessories.
Frequently Asked Questions
Can herbs really grow well in a kitchen window?
Yes, many herbs can grow well in a kitchen window if they get enough light. The best results usually come from a bright south- or east-facing window, plus careful watering.
Which herbs are easiest for beginners indoors?
Chives, parsley, mint, thyme, and oregano are usually among the easiest. Basil can also do well, but it tends to need stronger light and warm conditions.
How often should I water kitchen window herbs?
There is no perfect schedule because light, temperature, pot size, and season all affect drying time. Check the top inch of soil and water when it feels dry.
Do I need a grow light for indoor herbs?
Not always. If your window gets at least 6 hours of strong light, you may not need one. If growth is weak or leggy, a grow light can make a big difference.
Should I grow herbs from seeds or buy plants?
For beginners, starter plants are usually easier and faster. Seeds are budget-friendly and rewarding, but they require more patience and early care.
Final Thoughts
Growing herbs in a kitchen window is one of the easiest ways to start an edible garden at home. With a sunny spot, the right pots, and a simple watering routine, you can enjoy fresh flavor right from your windowsill.
Start small, pay attention to light and moisture, and harvest regularly. Even a tiny kitchen herb garden can build your confidence and make home cooking feel more connected to the seasons.