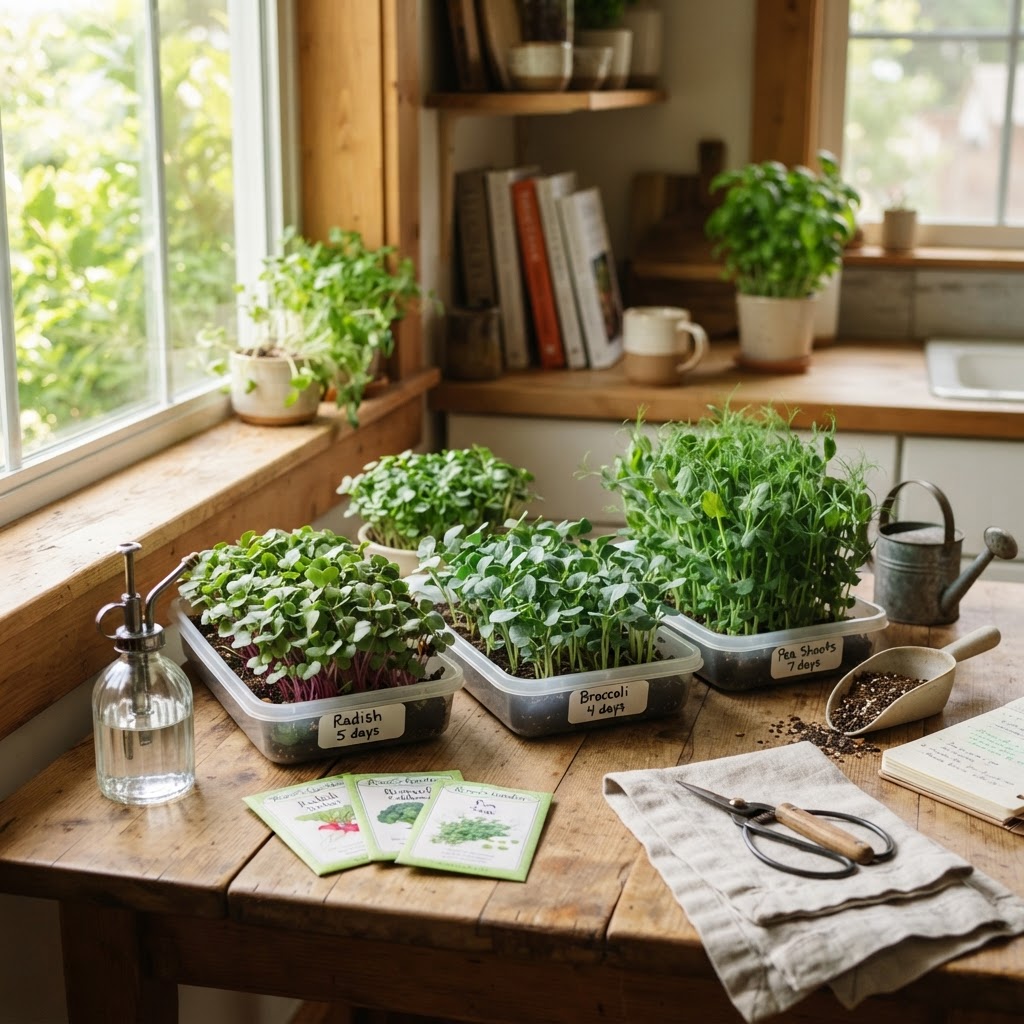
How to Grow Microgreens at Home for Beginners: Easy Step-by-Step Guide
If you want to grow something edible fast, microgreens are one of the easiest places to start. They need very little space, grow indoors, and can be ready to harvest in as little as 7 to 14 days.
The best part is that you do not need a big garden, fancy equipment, or years of experience. With a tray, seeds, light, and a little daily attention, you can grow fresh, flavorful greens right on your kitchen counter or a sunny shelf.
Why This Topic Matters
Learning how to grow microgreens at home for beginners is a great first step into vegetable gardening. Microgreens are simple, quick, and rewarding, which makes them perfect if you are just starting out.
They are also practical for everyday life. You can grow them in small apartments, during cold weather, or anytime your outdoor garden is not producing much.
Microgreens are young vegetable or herb seedlings harvested shortly after their first true leaves begin to form. They are often used to add flavor, texture, and color to salads, sandwiches, soups, grain bowls, and eggs.
For beginner gardeners, microgreens offer a few big advantages:
- They grow quickly, so you see results fast
- They need very little room
- You can grow them indoors year-round
- They are less intimidating than growing full-size vegetables
- One small setup can produce multiple harvests over time
They can also help build confidence. When you see seeds sprout and turn into something you can actually eat within a couple of weeks, gardening starts to feel much more doable.
Quick Answer
To grow microgreens at home, fill a shallow tray with seed-starting mix or another clean growing medium, scatter seeds evenly across the surface, press them down gently, mist with water, and keep them moist until they sprout. Once they germinate, place them under bright light, water carefully from the bottom or with a gentle spray, and harvest with scissors when they are about 2 to 4 inches tall.
For most beginners, the easiest microgreens to start with are:
- Radish
- Broccoli
- Pea shoots
- Sunflower
- Mustard
- Kale
Most microgreens are ready to harvest in 7 to 14 days, though some varieties take a little longer.
Step-by-Step Guide
Growing microgreens is simple, but a few small details make a big difference. Follow these steps to set yourself up for a healthy, reliable crop.
1. Choose beginner-friendly seeds
Start with seeds that germinate quickly and grow evenly. Radish, broccoli, kale, and mustard are especially forgiving for first-time growers.
Pea and sunflower microgreens are also popular, but they are a little larger and often benefit from soaking before planting. If you want the easiest possible first harvest, begin with radish or broccoli.
When buying seed, look for untreated seeds sold for sprouting or microgreens when possible. Regular garden seed can work too, but you want seed that has not been coated with chemicals.
2. Pick a shallow container
Microgreens do not need deep pots because they are harvested young. A shallow tray about 1 to 2 inches deep is enough for most varieties.
You can use:
- Seed trays
- Reused food containers with drainage holes added
- Plastic nursery trays
- Microgreen growing trays
If your tray does not have drainage holes, be extra careful with watering. Too much standing water can lead to mold or rot.
3. Choose a growing medium
Many beginners use a fine seed-starting mix because it is easy to work with and holds moisture well. Coconut coir is another good option.
Some people grow microgreens on grow mats or paper-based mats, but soil or seed-starting mix is often the most forgiving choice when you are learning.
A good medium should be:
- Clean
- Light and fluffy
- Able to hold moisture without staying soggy
- Free of large sticks or chunks
4. Fill and level the tray
Add about 1 to 1.5 inches of moist growing medium to the tray. Gently level the surface so the seeds have even contact with the top.
Do not pack the soil down hard. A light press is enough to create a smooth, even surface.
5. Sow the seeds densely but not in thick clumps
Scatter seeds evenly over the surface. Microgreens are planted more densely than regular garden crops because you are harvesting them young.
Try to cover the surface well, but avoid piling seeds on top of each other in thick patches. Crowded, uneven sowing can reduce airflow and encourage mold.
As a rough guide:
- Small seeds like broccoli or kale can be sprinkled fairly thickly
- Larger seeds like peas and sunflower need more space between them
After sowing, gently press the seeds onto the surface. This helps improve contact with the growing medium.
6. Mist and cover for germination
Mist the seeds well with clean water. Then cover the tray with a lid, another empty tray, or a piece of cardboard for the first few days.
This helps maintain moisture and creates a dark environment that encourages strong germination. Some growers also place a light weight on top of the cover for certain varieties to improve rooting, especially with sunflower or pea shoots.
Check the tray once or twice a day. The surface should stay moist but not dripping wet.
7. Uncover once the seeds sprout
When most of the seeds have germinated and begin pushing upward, remove the cover. At this stage, they need light to keep growing well.
If left covered too long, seedlings can become pale, stretched, and weak. Once uncovered, they will usually green up quickly.
8. Provide enough light
Light is one of the biggest factors in growing sturdy microgreens. A sunny windowsill can work, but many beginners get more reliable results with a simple grow light.
Aim for about 12 to 16 hours of bright light each day. Keep the light close enough to prevent leggy growth, but not so close that it overheats the seedlings.
If you are using a window, rotate the tray regularly so the greens do not lean too far in one direction.
9. Water carefully
Microgreens need consistent moisture, especially in the first week. The goal is damp, not soaked.
Bottom watering is often the easiest method. To do this, place the tray in a shallow container of water for a short time and let the growing medium absorb moisture from below.
You can also use a spray bottle for gentle watering, especially right after sowing. Avoid blasting the seedlings with a strong stream of water, which can knock them over.
10. Watch for harvest time
Most microgreens are ready when they are about 2 to 4 inches tall and have developed their seed leaves, with some just starting to show true leaves. Flavor often becomes stronger as they grow.
Use clean scissors to snip them just above the soil line. Harvest only what you need, or cut the whole tray at once.
Rinse gently if needed and use them fresh for the best texture.
11. Start another tray right away
One reason microgreens are so satisfying is how easy it is to keep a steady supply going. Once you harvest a tray, start another one the same day or the next.
Most microgreens are grown as a single-cut crop, which means they usually do not regrow well after harvest. A simple staggered planting schedule gives you fresh greens every week.
Common Beginner Mistakes
Almost everyone makes a few mistakes with their first tray, so do not let setbacks discourage you. Small adjustments usually solve the problem quickly.
Overwatering
This is probably the most common issue. Soggy growing medium can lead to mold, poor airflow, and weak roots.
If your tray feels waterlogged or smells unpleasant, reduce watering and improve drainage. Moisture should be steady, but the tray should never sit in water for long periods.
Using too many seeds
Dense sowing is good, but overdoing it creates thick mats of seedlings with poor airflow. That can increase the risk of disease and make harvesting messy.
Try for even coverage rather than maximum seed volume. With experience, you will get a better feel for the right amount.
Not enough light
If microgreens become tall, pale, and floppy, they likely need more light. A weak winter windowsill is often not enough for compact growth.
A basic LED grow light can make a huge difference for beginners growing indoors.
Poor airflow
Still, humid air can encourage mold. This is especially true in small indoor spaces.
A small fan nearby, used gently, can improve airflow. Just do not point strong wind directly at very young seedlings.
Harvesting too late
If you wait too long, microgreens can become tougher or more bitter, depending on the variety. They are best when young and tender.
Harvest when they look fresh, upright, and well-sized rather than trying to stretch the tray too far.
Starting with tricky crops
Some varieties are more temperamental than others. Cilantro, for example, can be slower and less beginner-friendly than radish or broccoli.
Choose easy seeds for your first few rounds. Success early on makes learning much more enjoyable.
Best Tips for Success
A few practical habits can help you get better results right from the start.
Start simple
Do not try five new seed types at once. Begin with one or two reliable varieties and learn their growth pattern.
This makes troubleshooting much easier if something goes wrong.
Label your trays
Write down the seed type and planting date. It sounds basic, but it helps a lot once you start growing more than one tray at a time.
Keep everything clean
Wash trays between crops and use clean tools. Good sanitation lowers the chance of mold and other problems.
Soak larger seeds when needed
Peas and sunflower seeds often do better with a pre-soak of several hours before planting. This helps them germinate more evenly.
Always check the needs of the variety you are growing, since not all seeds need soaking.
Use a blackout period wisely
A short covered period during germination can improve sprouting and rooting. But once most seedlings are pushing up, uncover them promptly and move them to light.
Grow in small batches
A little goes a long way with microgreens. Starting with small trays helps you avoid waste and gives you room to practice.
Taste different varieties
Microgreens can range from mild and sweet to peppery and bold. Growing a few kinds over time helps you discover what you actually enjoy eating.
Popular flavor profiles include:
- Radish: spicy and crisp
- Broccoli: mild and fresh
- Pea shoots: sweet and tender
- Mustard: peppery
- Sunflower: nutty and substantial
Recommended Supplies or Tools
You do not need an expensive setup to grow microgreens at home. A few basic supplies are enough.
Here is a simple beginner list:
- Shallow growing trays
- Seed-starting mix or coconut coir
- Microgreen or untreated garden seeds
- Spray bottle
- Clean scissors
- A sunny window or LED grow light
- Optional bottom tray for watering
- Optional small fan for airflow
If you want a simple tray option, a standard seed-starting tray works well. If you prefer a dedicated lighting setup, a basic full-spectrum LED grow light can give more consistent results than a window, especially in winter.
If you mention products in your own planning, be sure any Amazon links use the full format required by your site. For example: https://www.amazon.com/dp/B08N5WRWNW?tag=sustainablevegetablegardening-20
That said, many beginners can get started with reused containers and supplies they already have at home. Clean salad boxes, takeout containers, or nursery trays can work well if they are shallow and easy to manage.
Frequently Asked Questions
Do microgreens need direct sunlight?
Not necessarily. They need bright light, but direct sunlight is not always required.
A sunny windowsill may work in some homes, but many beginners get stronger, more even growth with a grow light. If your seedlings are stretching, your light source probably is not strong enough.
How long do microgreens take to grow?
Most microgreens are ready in about 7 to 14 days. Some larger or slower varieties may take a bit longer.
Fast growers like radish often give quick results, which is one reason they are great for beginners.
Can I regrow microgreens after cutting them?
Most microgreens are grown as a one-time harvest. After cutting, they usually do not regrow well enough to produce a strong second crop.
It is generally better to compost the used growing medium, clean the tray, and start fresh.
Are microgreens easy for beginners?
Yes, microgreens are one of the easiest edible crops for beginners to grow. They are fast, compact, and do not require a full outdoor garden.
They are also forgiving enough that even if your first tray is not perfect, you can try again right away and improve quickly.
What are the easiest microgreens to grow at home?
Radish, broccoli, kale, mustard, and pea shoots are among the easiest options. These varieties usually germinate well and are widely available.
If you are completely new, start with radish or broccoli for your first tray.
Final Thoughts
If you have been wondering how to grow microgreens at home for beginners, the good news is that it is much simpler than it may seem. With a shallow tray, quality seeds, moisture, and enough light, you can grow fresh greens in a surprisingly short time.
Start small, keep your setup clean, and do not worry about getting everything perfect on the first try. Microgreens are one of the best crops for building gardening confidence, and once you harvest your first tray, you will likely want to start another right away.