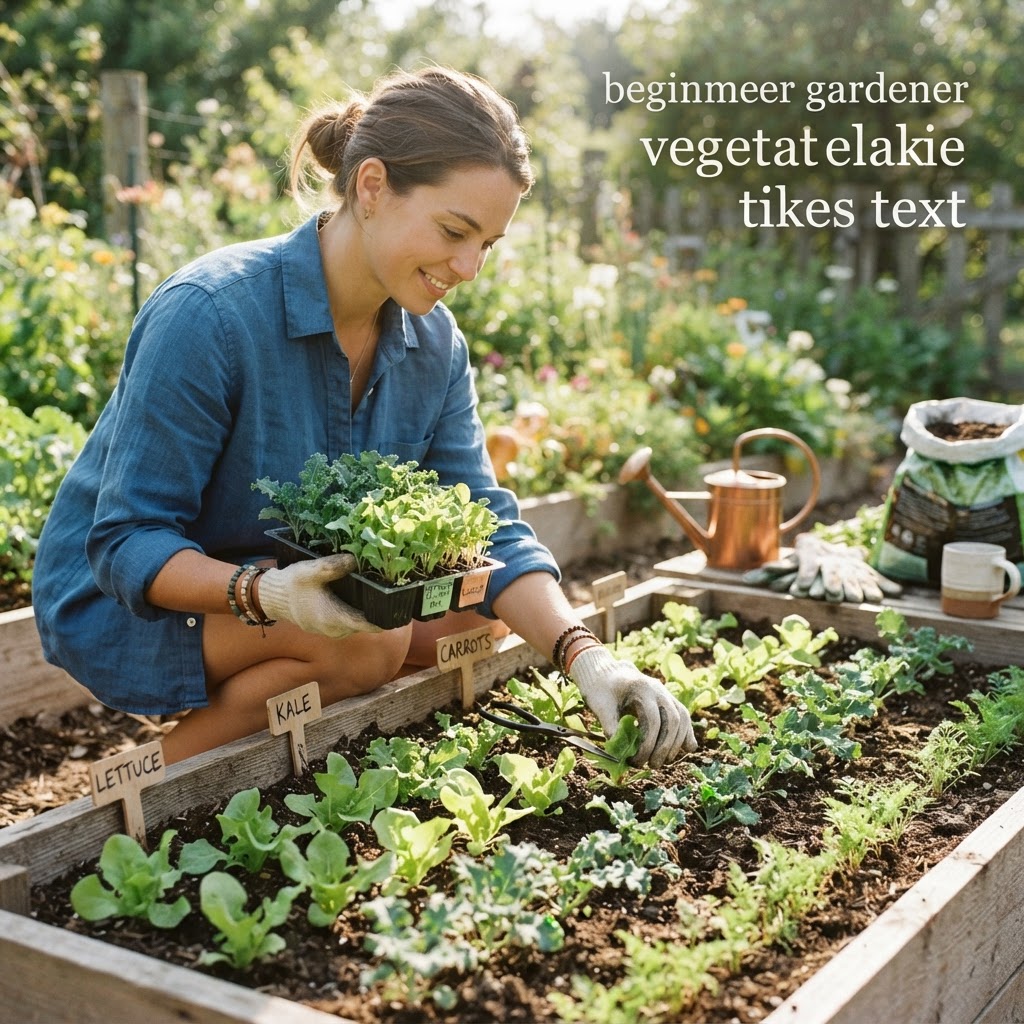
How to Thin Vegetable Seedlings Without Killing Them: A Simple Beginner’s Guide
If you’ve ever sprinkled seeds a little too generously, you’re not alone. Most beginner gardeners end up with crowded trays or rows and then panic at the thought of pulling out healthy little plants.
The good news is that learning how to thin vegetable seedlings without killing them is much easier than it sounds. With the right timing and a gentle approach, you can protect the seedlings you keep and set them up for stronger growth.
Why This Topic Matters
Thinning feels wasteful at first, but it’s one of the kindest things you can do for your vegetable garden. When too many seedlings grow in the same small space, they compete for light, water, nutrients, and airflow.
That competition leads to weak stems, small roots, slow growth, and a higher risk of disease. Even if all the seedlings look healthy now, overcrowding usually catches up with them later.
Proper thinning helps the strongest seedlings develop into productive plants. Instead of several stressed plants fighting each other, you get fewer plants that grow faster, healthier, and often produce much better harvests.
This is especially important for crops that are commonly direct sown or started thickly in trays, such as:
- Carrots
- Beets
- Lettuce
- Radishes
- Spinach
- Onions
- Brassicas like cabbage, broccoli, and kale
- Tomatoes, peppers, and herbs started indoors
If you skip thinning, your plants may stay stunted even if you water and fertilize correctly. Spacing matters just as much as sunshine and soil.
Quick Answer
To thin vegetable seedlings without killing them, wait until they have at least one to two sets of true leaves, identify the strongest seedlings, and remove the extras carefully. In most cases, the safest method is to snip unwanted seedlings at soil level with small scissors instead of pulling them out.
Snipping avoids disturbing the roots of nearby seedlings. If you want to save extras, only transplant them when they are still young, the soil is moist, and the roots can be separated with minimal damage.
In short:
- Water the soil first.
- Choose the healthiest seedlings to keep.
- Snip the weaker ones at the base.
- Follow the spacing recommended on the seed packet.
- Handle roots as little as possible.
Step-by-Step Guide
Thinning is simple once you break it into small steps. Here’s how to do it with confidence.
1. Wait for the Right Stage
Don’t thin the moment seedlings sprout. At that stage, it’s hard to tell which ones are strongest, and they are very delicate.
A good rule is to wait until seedlings have developed their first set or two of true leaves. True leaves appear after the first smooth seed leaves and look more like the mature plant’s foliage.
By then, you can usually spot which seedlings are:
- Taller and sturdier
- Better colored
- More upright
- Less damaged
- More vigorous overall
2. Read the Recommended Spacing
Before removing anything, check the seed packet or plant label for spacing. Different vegetables need very different amounts of room.
For example:
- Carrots may need 2 to 3 inches apart
- Leaf lettuce may need 4 to 6 inches apart
- Head lettuce may need 10 to 12 inches apart
- Radishes may need 1 to 3 inches apart depending on variety
- Tomatoes usually need one seedling per pot before transplanting out
If you guess, it’s easy to leave too many seedlings behind. Proper spacing is what allows roots and leaves to develop fully.
3. Water the Soil First
This is one of the easiest ways to reduce stress. Lightly water the area before thinning so the soil is damp but not soggy.
Moist soil helps in two ways. First, it reduces shock if you need to separate seedlings for transplanting. Second, it keeps the remaining roots more stable if any nearby soil shifts.
If the soil is dry and crumbly, pulling or moving seedlings can damage neighboring roots much more easily.
4. Choose the Best Seedlings to Keep
Take a close look before making any cuts. Your goal is not to keep the tallest seedling every time, but the healthiest one.
Choose seedlings with:
- Thick stems
- Good leaf color
- Compact growth
- No signs of disease
- No broken or bent stems
Remove seedlings that look weak, pale, stretched out, or crowded in awkward directions. If two seedlings are very close together, keep the one that is better positioned.
5. Snip Extras at Soil Level
For most vegetables, this is the best method. Use clean, sharp scissors, herb snips, or small pruning scissors to cut unwanted seedlings right at the soil surface.
Do not tug upward unless you are intentionally transplanting them. Pulling can disturb the roots of the seedling you want to keep, especially in cell trays, seed-starting flats, or tightly sown garden rows.
Snipping is ideal for:
- Carrots
- Radishes
- Lettuce
- Spinach
- Beets
- Most seedlings in trays when roots are tangled
This method may feel a little harsh at first, but it usually causes the least overall harm.
6. Transplant Extras Only When It Makes Sense
Some seedlings handle transplanting fairly well, while others hate root disturbance. If you want to save extras, do it only with plants that tolerate moving.
Seedlings that often transplant well when young include:
- Lettuce
- Kale
- Broccoli
- Cabbage
- Basil
- Tomatoes
Seedlings that generally do not like being disturbed include:
- Carrots
- Radishes
- Turnips
- Parsnips
To transplant extras safely:
- Water the soil first.
- Use a plant label, spoon, dibber, or small tool to lift from underneath.
- Hold seedlings by the leaves, not the stem.
- Move them quickly into prepared soil.
- Water them in right away.
If roots are heavily intertwined, it is often better to snip than separate.
7. Thin in Stages for Tiny Seedlings
For very fine seedlings, especially carrots or lettuce, you do not always need to go from overcrowded to perfect spacing in one session.
You can do a first thinning when seedlings are small, then a second thinning a week or two later. This staged approach is helpful when you want to avoid accidental over-thinning or when you’re still learning to judge spacing.
For example:
- First thinning: remove obvious clusters
- Second thinning: adjust to final spacing once plants are easier to handle
This also lets you harvest some baby greens from certain crops, like lettuce or spinach.
8. Keep the Remaining Seedlings Undisturbed
After thinning, resist the urge to fuss too much. The seedlings you kept will benefit from a calm recovery period.
Avoid deep watering blasts, rough handling, or poking around near roots. A gentle watering if needed is enough.
Over the next several days, the remaining seedlings should begin to fill in the available space and grow more vigorously.
9. Provide Good Follow-Up Care
Thinning solves crowding, but your seedlings still need the basics to thrive.
After thinning, make sure they have:
- Adequate sunlight or strong grow lights
- Even moisture, not soggy soil
- Good airflow
- Appropriate temperature for the crop
- Enough room to continue growing
Indoor seedlings may need a small fan nearby for airflow. Outdoor seedlings may benefit from light mulch once established, depending on the crop.
10. Learn from Each Round
Every thinning session helps you build confidence. You’ll start to notice patterns, like which seeds tend to be over-sown, which crops transplant well, and how much space each plant really needs.
Beginner gardeners often improve quickly with this one skill because the results are visible. A week after thinning, plants usually look stronger, greener, and less stressed.
Common Beginner Mistakes
Almost everyone makes a few mistakes when learning to thin seedlings. The good news is that they are easy to avoid once you know what to watch for.
Pulling Instead of Snipping
The most common mistake is yanking out extras by hand. This can tear the delicate roots of neighboring seedlings and set back the ones you intended to keep.
If you remember only one tip from this article, make it this: snip most extra seedlings at the soil line.
Waiting Too Long
Overcrowded seedlings become harder to separate as roots grow together. Waiting too long also means the plants compete for too long before you solve the problem.
Thin once seedlings have true leaves and before they become a tangled mat.
Keeping Too Many “Just in Case”
It’s tempting to leave extras because removing them feels risky. But keeping too many usually creates more problems than thinning properly.
One healthy plant with enough space is better than three crowded plants that never thrive.
Choosing by Height Alone
A tall seedling is not always the strongest. Some are leggy because they stretched for light.
Look for sturdy stems, good color, and balanced growth rather than just height.
Transplanting Crops That Hate Disturbance
Some vegetables simply do better when thinned in place. Root crops in particular often suffer if moved.
If you try to save every extra carrot or radish seedling, you may end up with poor root development. It’s usually better to snip and let the best-positioned seedlings stay put.
Thinning Dry Soil
Dry soil increases the chance of root disturbance and transplant shock. A little moisture before thinning makes the work gentler and easier.
Damaging Stems While Handling
Seedling stems are fragile. If you need to move extras, always handle them by the leaves.
Leaves can regrow to some degree. A crushed stem usually ends the plant.
Best Tips for Success
If you want thinning to feel less stressful and more effective, these practical tips help a lot.
Start with a “Less Is More” Mindset
The goal of sowing seeds is not to keep every plant. The goal is to end up with the right number of strong, productive plants.
Thinking this way makes thinning feel like part of good care, not plant loss.
Use Small, Clean Scissors
A tiny pair of scissors gives you more control than your fingers. Clean blades also reduce the chance of spreading disease.
Wipe them before use, especially if you’ve been working with plants that had any sign of disease.
Thin When You’re Not Rushed
This is delicate work, especially with tiny seedlings. Try thinning when you have enough time and good light.
A calm 10-minute session often goes much better than a hurried attempt.
Label Rows and Trays Clearly
When everything is small and green, it’s easy to forget which crop is which. Labels help you apply the right final spacing and avoid mistakes.
Expect It to Feel Wrong the First Time
Many gardeners hesitate the first few times they thin. That feeling is normal.
Once you see how much better the remaining seedlings grow, your confidence will rise quickly.
Use Thinnings When Possible
Some thinned seedlings can still be useful. Depending on the crop and size, you may be able to:
- Eat them as microgreens or baby greens
- Compost them
- Transplant them elsewhere if suitable
This can make the process feel less wasteful.
Sow More Carefully Next Time
Thinning is normal, but you can reduce extra work by sowing more thinly in the future. Try spacing seeds more evenly or using a damp fingertip, seed sower, or folded paper to distribute tiny seeds.
You do not need perfect spacing, just better spacing.
Recommended Supplies or Tools
You don’t need much to thin seedlings well. A few simple tools make the process easier and gentler.
Basic Helpful Supplies
- Small sharp scissors or herb snips
- Plant labels
- Watering can with a gentle rose or a spray bottle
- Dibber, spoon, or plant label for lifting seedlings
- Seed packet or spacing guide
- Tray or bowl for collecting thinnings
Nice-to-Have Tools
If you start many seedlings indoors, these extras can help:
- Fine-tip garden scissors
- Tweezers for very tiny seedlings
- A headlamp or bright task light
- A small fan for indoor airflow
- Cell trays that reduce root tangling
Keep in mind that good technique matters more than fancy tools.
Frequently Asked Questions
Can I replant the seedlings I thin out?
Sometimes, yes. Lettuce, tomatoes, kale, basil, broccoli, and cabbage often transplant well when they are still small.
But root crops like carrots, radishes, and turnips usually do not respond well to being moved. For those, snipping is usually the better choice.
Is it better to thin seedlings by pulling or cutting?
Cutting is usually better. Snipping seedlings at the soil line avoids disturbing the roots of nearby plants.
Pulling may work in very loose soil with widely spaced seedlings, but for beginners, cutting is the safer method.
When should I thin vegetable seedlings?
Thin seedlings after they develop their first set or two of true leaves. At that stage, they are easier to judge and strong enough for gentle handling.
If you wait too long, roots may become tangled and competition may slow growth.
What happens if I don’t thin seedlings?
If you skip thinning, plants often become overcrowded and compete for water, nutrients, light, and air. This can lead to weak growth, higher disease risk, and lower yields.
Even if the seedlings survive, they may never reach their full potential.
How do I know which seedling to keep?
Keep the healthiest seedling, not always the tallest one. Look for strong stems, good color, compact growth, and the best position for final spacing.
If two seedlings look similar, keep the one that is easiest to leave undisturbed.
Final Thoughts
Learning how to thin vegetable seedlings without killing them is one of those small gardening skills that makes a big difference. It protects the roots of the plants you keep, prevents overcrowding, and helps your vegetables grow stronger from the start.
If you’re a beginner, remember this simple approach: wait for true leaves, moisten the soil, keep the healthiest seedlings, and snip the extras at the base. It may feel tough the first time, but it quickly becomes a normal part of growing healthy vegetables at home.
Every strong harvest starts with small decisions like this one. Thin gently, trust the process, and your garden will thank you.