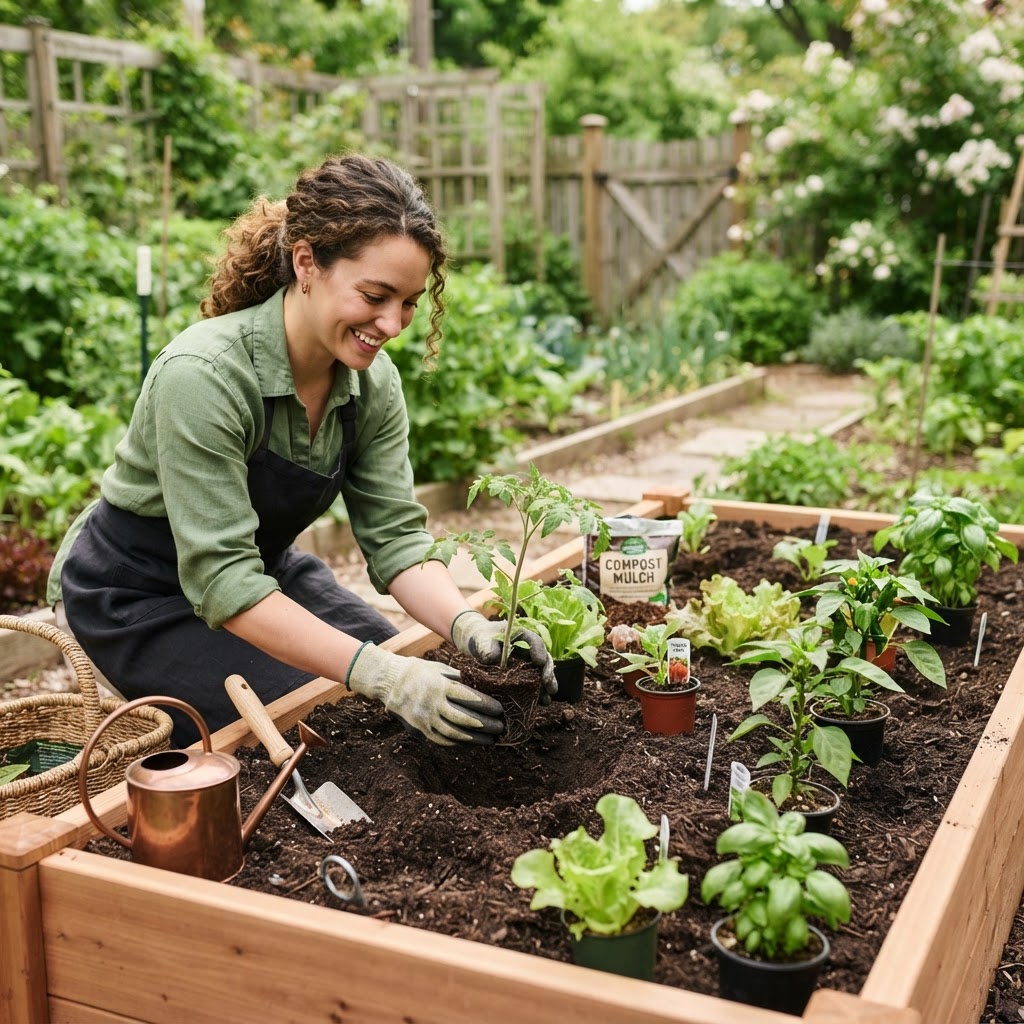
How to Transplant Seedlings to an Outdoor Garden Without Shock
Starting vegetables from seed is exciting, but moving those tender young plants outside can feel intimidating. The good news is that once you understand timing, hardening off, and planting technique, transplanting seedlings to an outdoor garden becomes much easier and far less risky.
Why This Topic Matters
Healthy transplants give your garden a strong head start. When seedlings move into the garden at the right time and in the right way, they establish roots faster, grow more evenly, and are better able to handle wind, sun, and changing temperatures.
For beginners, transplanting is one of the moments when mistakes can set plants back. Seedlings that were thriving indoors may wilt, stall, or even die if they are rushed outside too soon or planted carelessly.
Learning how to transplant seedlings to outdoor garden beds properly helps you avoid common problems like transplant shock, sunscald, broken stems, and poor root development. It also saves time, money, and frustration, especially if you have raised your plants from seed over several weeks.
Quick Answer
To transplant seedlings to an outdoor garden successfully, wait until the weather is warm enough for your crop, harden seedlings off for 7 to 10 days, prepare the bed in advance, and transplant on a calm, cloudy day or in the evening. Water seedlings before planting, handle them gently by the leaves or root ball, set them at the correct depth, firm the soil lightly, and water again right after transplanting.
Then keep the soil evenly moist for the first week or two while the roots settle in. If needed, provide temporary shade or wind protection until the plants adjust.
Step-by-Step Guide
1. Know when your seedlings are ready
Not every seedling is ready to leave its pot at the same size or age, but there are a few reliable signs. Most vegetable seedlings are ready for transplanting when they have at least 2 to 4 true leaves and a sturdy stem.
The plants should look healthy, compact, and well rooted, but not root-bound. If roots are circling tightly around the pot or growing out the drainage holes, transplant soon.
Also pay attention to your crop type. Warm-season vegetables like tomatoes, peppers, cucumbers, squash, and basil need warm soil and mild nights. Cool-season crops like lettuce, broccoli, cabbage, kale, and onions can go out earlier.
2. Check the weather and soil conditions
Timing matters as much as plant size. Transplanting too early is one of the fastest ways to stress seedlings.
Before moving plants outdoors, check:
- Your average last frost date
- Nighttime temperatures for the coming week
- Soil moisture and drainage
- Wind conditions
- Daytime heat levels
For warm-season crops, wait until the danger of frost has passed and nighttime temperatures are consistently suitable. Tomatoes and peppers, for example, are much happier when nights stay above about 50°F to 55°F.
Avoid transplanting into soggy soil. Wet, compacted ground can suffocate roots and make planting messy.
3. Harden off seedlings first
If your seedlings were grown indoors or in a protected greenhouse, they need time to adjust to real outdoor conditions. This process is called hardening off.
Hardening off helps seedlings adapt to:
- Direct sunlight
- Wind
- Cooler nights
- Fluctuating temperatures
- Lower humidity
Without this step, plants can scorch, wilt badly, or stop growing.
A simple 7- to 10-day hardening-off schedule works well:
- Day 1: Put seedlings outside in bright shade for 1 to 2 hours.
- Day 2: Increase outdoor time to 2 to 3 hours in shade.
- Day 3: Give a little early morning sun, then shade.
- Day 4 to 5: Gradually increase sun exposure and total time outdoors.
- Day 6 to 7: Leave plants out for most of the day, with some direct sun.
- Day 8 to 10: Leave them outside all day and, if temperatures are safe, overnight.
Bring seedlings in if there is strong wind, heavy rain, or an unexpected cold snap.
4. Prepare the garden bed before planting
Do as much prep work as possible before you carry the seedlings outside. The less time roots spend exposed, the better.
Start by removing weeds and loosening the soil. Mix in compost if needed to improve texture, drainage, and fertility.
Rake the bed smooth and mark your spacing. Each crop needs enough room for light, airflow, and mature growth.
Here are a few general spacing reminders:
- Tomatoes: often 18 to 36 inches apart, depending on variety
- Peppers: about 12 to 18 inches apart
- Lettuce: 8 to 12 inches apart
- Broccoli and cabbage: 18 inches or more
- Cucumbers and squash: follow seed packet or tag spacing carefully
If the weather is hot and dry, water the planting area before transplanting so the soil is evenly moist.
5. Water seedlings before removing them from pots
Dry root balls are harder to transplant and more likely to fall apart. Water seedlings an hour or so before planting so the roots and potting mix stay together.
Moist soil also helps reduce immediate stress. You want the plant to go into the garden hydrated, not struggling.
6. Choose the best time of day to transplant
Midday sun can be intense, especially for tender seedlings. The best time to transplant is usually:
- Late afternoon
- Early evening
- A cloudy day
- A calm day with little wind
This gives plants several cooler hours to settle in before facing strong sun.
7. Remove each seedling gently
When taking a seedling out of its container, avoid pulling on the stem. A damaged stem can ruin the whole plant.
Instead:
- Squeeze the sides of the pot gently
- Tip the pot and support the soil with your hand
- Hold the seedling by a leaf if needed, not the stem
- Slide the root ball out carefully
Leaves can regrow. A crushed stem usually cannot.
If roots are circling the outside, loosen them gently with your fingers. You do not need to tear them apart aggressively. Just encourage them to grow outward into the garden soil.
8. Plant at the proper depth
Correct depth depends on the vegetable. Most seedlings should be planted at the same depth they were growing in their pot.
Tomatoes are the main exception. They can form roots along buried stems, so you can plant them deeper than they were in the container, removing the lower leaves first.
For most other crops, avoid burying the stem too deeply. Deep planting can lead to rot or poor growth.
9. Backfill and firm the soil lightly
Place the seedling in the hole, fill soil back around the roots, and press gently to remove large air pockets. You want good root-to-soil contact, but do not compact the soil hard.
The goal is snug, not squashed.
10. Water immediately after transplanting
This step is essential. Watering right away settles the soil around the roots and helps the seedling recover from the move.
Give each transplant a deep, gentle watering at the base. Avoid blasting the plant with a strong hose stream that can wash soil away.
11. Add mulch if conditions are right
Once seedlings are settled, a light layer of mulch can help retain moisture and reduce weeds. Straw, shredded leaves, or untreated grass clippings can work well.
Keep mulch a little away from the stem so moisture does not stay trapped against it.
For heat-loving crops, wait until the soil has warmed well before applying a heavy mulch layer.
12. Watch closely for the first 7 to 14 days
The first week after transplanting is when seedlings need the most attention. Check them daily for moisture, pest damage, wind stress, and signs of shock.
A little drooping on the first day can be normal. But severe wilting, bleached leaves, stem damage, or stalled growth means the plant needs help.
To support new transplants:
- Water consistently but do not keep soil waterlogged
- Provide temporary shade during extreme sun
- Protect from strong wind
- Cover if an unexpected cold night is coming
- Keep an eye out for cutworms, slugs, and flea beetles
Common Beginner Mistakes
Skipping hardening off
This is one of the biggest beginner mistakes. Seedlings grown indoors are not ready for full outdoor sun and wind all at once.
Even healthy plants can burn badly after a single rushed day outside.
Transplanting too early
It is tempting to plant as soon as the weather feels pleasant, but one warm afternoon does not mean the season is ready. Cold soil and chilly nights can stunt warm-season crops for weeks.
If in doubt, wait a little longer.
Handling seedlings by the stem
Seedling stems are delicate. Always support plants by the root ball, pot, or a leaf instead.
Planting in the heat of the day
Bright midday sun increases water loss and stress. Cooler evening conditions are much kinder to new transplants.
Forgetting to water right away
A newly planted seedling cannot search widely for water yet. Dry soil around the root ball can quickly lead to transplant shock.
Overwatering after transplanting
While steady moisture is important, constantly soggy soil can be just as harmful as drought. Roots need oxygen as well as water.
Aim for evenly moist soil, not mud.
Poor spacing
Tiny seedlings make it easy to underestimate mature size. Crowding reduces airflow, raises disease risk, and makes harvesting harder later.
Ignoring wind
Sun gets most of the attention, but wind can be just as damaging. Tender seedlings can dry out, lean, or snap in exposed spots.
Best Tips for Success
Match the crop to the season
Cool-season vegetables and warm-season vegetables have different comfort zones. Respecting that difference makes transplanting much smoother.
If a crop hates cold, do not rush it.
Start with healthy seedlings
Strong seedlings transplant better than weak, leggy ones. Look for stocky growth, good color, and roots that are developed but not tangled.
If seedlings are stretched and floppy, give them better light earlier next time.
Use compost, not too much fertilizer
A modest amount of compost improves soil without overwhelming seedlings. Heavy fertilizer right at transplant time can push weak, rapid top growth before roots are established.
Label what you plant
It sounds simple, but labels help a lot, especially if you are growing several varieties. You will know what is where, how far apart it should be, and when to expect maturity.
Give extra support to sensitive plants
Some seedlings appreciate temporary protection during their first few days outside. Consider using:
- Shade cloth
- Row cover
- Cloches
- Low hoops
- Windbreaks
This is especially helpful during sudden heat, cold, or insect pressure.
Water deeply, not constantly
Frequent shallow watering can keep roots near the surface. Deep watering encourages roots to grow down where moisture lasts longer.
Check the soil with your finger before watering again.
Keep notes for next season
Every garden is a little different. Writing down your transplant dates, weather, and results can help you improve year after year.
Recommended Supplies or Tools
You do not need a lot of fancy equipment to transplant seedlings well. A few basic tools make the job easier and gentler on young plants.
Helpful supplies include:
- Hand trowel
- Watering can or gentle hose wand
- Compost
- Plant labels
- Mulch
- Shade cloth or row cover
- Gardening gloves
- Bucket or tray for carrying seedlings
If you want to keep things simple, start with the essentials: a trowel, water, compost, and some type of temporary protection if the weather is harsh.
A few optional tools that many home gardeners like are:
- Soil thermometer for checking spring soil warmth
- Dibber or transplanting tool for small plugs
- Drip irrigation or soaker hose for steady watering
Frequently Asked Questions
How long should seedlings be hardened off before transplanting?
Most seedlings do best with 7 to 10 days of hardening off. This gradual transition helps them adapt to direct sun, wind, and cooler outdoor temperatures.
Some delicate plants may benefit from a slightly longer hardening-off period, especially if indoor conditions were very sheltered.
Should I water seedlings before or after transplanting?
Both. Water seedlings before transplanting so the root ball stays intact and hydrated, then water again immediately after planting to settle the soil around the roots.
That combination greatly reduces stress.
What does transplant shock look like?
Transplant shock often shows up as wilting, drooping, slowed growth, yellowing, or leaf scorch. Mild shock is common and plants often recover, but severe stress can stunt them for a while.
Good timing, hardening off, and careful watering help prevent it.
Can leggy seedlings still be transplanted?
Sometimes, yes. Tomatoes often recover well because they can be planted deeper. Other crops may not perform as strongly if they are weak and stretched.
If the stem is thin and floppy, handle the plant very gently and provide support if needed.
Is it better to transplant on a cloudy day?
Yes, cloudy weather is ideal because it reduces stress from intense sun. If the forecast is clear, transplant in the late afternoon or evening instead.
Final Thoughts
Learning how to transplant seedlings to outdoor garden beds is one of the most useful skills a new vegetable gardener can build. It may seem delicate at first, but with a little planning and a gentle routine, your seedlings can move outside smoothly and start growing with confidence.
Remember the basics: wait for the right weather, harden off your plants, handle roots and stems carefully, plant at the correct depth, and water well right away. Once you do this a few times, transplanting will feel far less stressful and much more rewarding.
Your seedlings do not need perfection. They just need a thoughtful start in the garden.