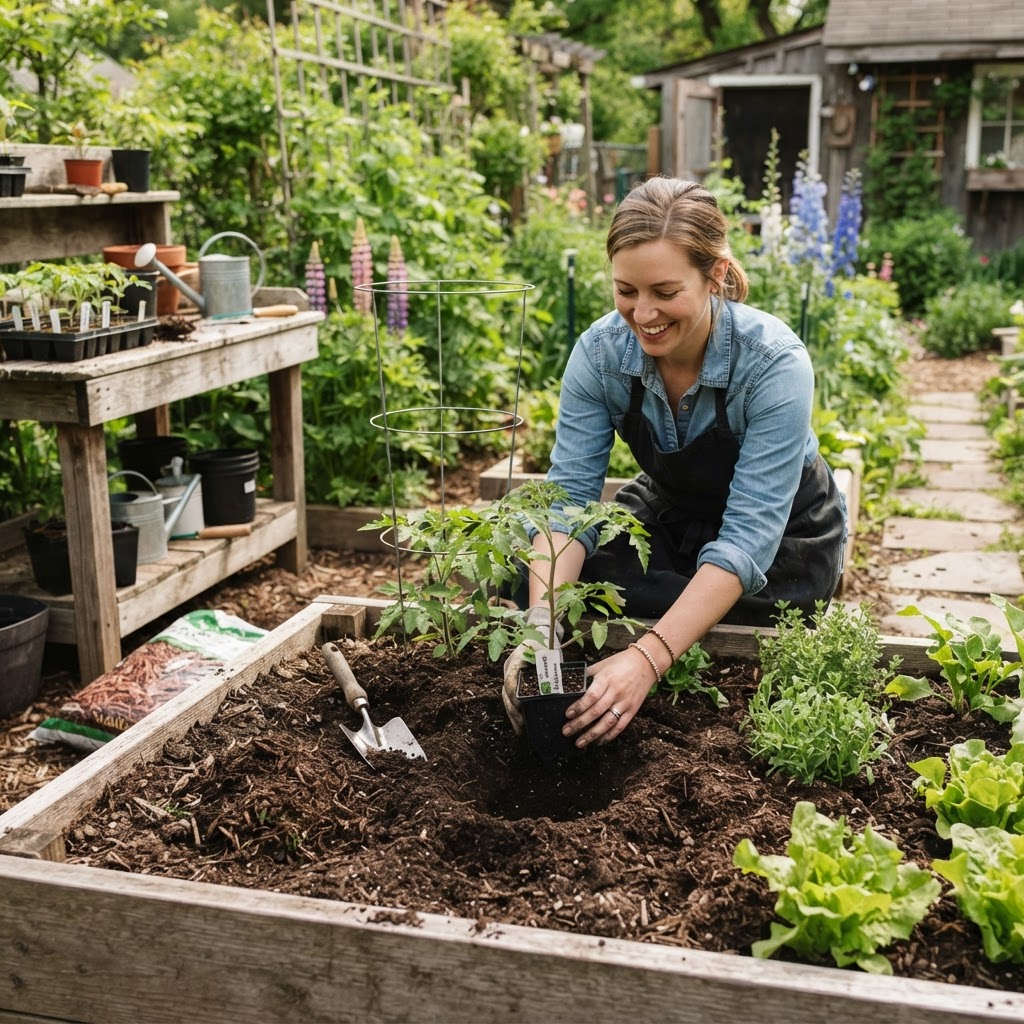
When Should I Transplant Tomato Seedlings? A Beginner’s Step-by-Step Guide
Tomato seedlings can look ready one day and droopy the next, so it’s no surprise that timing feels tricky. If you’ve been wondering when should I transplant tomato seedlings, the short answer is: not too early, and not just based on size alone.
The best time to transplant depends on your weather, your seedling’s growth stage, and how well you prepare it for the move. Once you know what signs to look for, the process becomes much easier and far less stressful.
Why This Topic Matters
Tomatoes are warm-season plants that dislike cold soil, chilly nights, and sudden changes. If you transplant too soon, your seedlings may stall, turn purple, wilt, or even die back.
If you wait too long, seedlings can become root-bound, leggy, and stressed in their containers. That can slow growth and reduce your harvest later in the season.
Getting the timing right helps tomato plants:
- establish roots quickly
- grow strong stems
- handle outdoor conditions better
- flower and fruit earlier
- resist stress and disease more effectively
For beginners, transplant timing is one of the biggest factors in tomato success. A healthy start often leads to healthier plants all summer.
Quick Answer
Transplant tomato seedlings outdoors after your last frost date, when nighttime temperatures stay consistently above 50°F (10°C), and the seedlings have been hardened off for 7 to 10 days.
Most tomato seedlings are ready for the garden when they are:
- 6 to 8 weeks old
- 6 to 10 inches tall
- equipped with several sets of true leaves
- growing in a sturdy, stocky shape rather than thin and floppy
If you are moving seedlings from a seed tray into larger pots indoors, do that earlier, usually when they develop their first set or two of true leaves and begin to outgrow the cell pack.
A simple way to remember it is this: warm weather, warm soil, and sturdy seedlings.
Step-by-Step Guide
1. Know your last frost date
Your average last frost date gives you a starting point, but it should not be your only guide. Spring weather can swing wildly, and tomatoes do not like surprise cold snaps.
Look up your local last frost date for your zip code or growing zone. Then watch the actual forecast for your area before planting.
As a rule, wait until:
- all danger of frost has passed
- nighttime temperatures are reliably above 50°F
- daytime temperatures are comfortably mild to warm
If nights are still dropping into the 40s, it is usually better to wait a little longer.
2. Check the size and age of your seedlings
Healthy transplant-ready tomato seedlings usually look compact and sturdy, not stretched and pale. Age matters, but appearance matters just as much.
Your seedlings are likely ready if they have:
- thickening stems
- dark green leaves
- 2 to 4 or more sets of true leaves
- a height of around 6 to 10 inches
Seedlings that are very tall and thin may need more light or support before transplanting. Seedlings that are tiny and underdeveloped may need more indoor growing time.
3. Make sure the soil is warm enough
Tomatoes grow best in warm soil. Even if the air feels pleasant, cold ground can shock young plants and delay growth.
A soil temperature of about 60°F (16°C) or warmer is a good target. If your garden soil is still cold and soggy, hold off for a few more days or use black mulch to help warm it.
Raised beds often warm up faster than in-ground beds. Containers also tend to heat up more quickly in spring.
4. Harden off seedlings before transplanting
Indoor-grown seedlings need time to adjust to wind, direct sunlight, and changing temperatures. This process is called hardening off, and it is one of the most important steps.
Without hardening off, even healthy seedlings can wilt badly or get sunscalded.
To harden off tomato seedlings:
- Place them outside in a sheltered, shady spot for 1 to 2 hours on day one.
- Increase outdoor time a little each day.
- Gradually expose them to more morning sun and light breeze.
- Bring them inside at night if temperatures are too cool.
- After 7 to 10 days, they should be ready for full outdoor conditions.
If the weather turns harsh during hardening off, slow down the process rather than pushing the plants too fast.
5. Prepare the planting area
Tomatoes need full sun, rich soil, and good drainage. Choose a spot that gets at least 6 to 8 hours of direct sunlight, though more is often better.
Before transplanting, prepare the bed by:
- removing weeds
- loosening the soil
- mixing in compost
- checking drainage
- setting up supports like cages or stakes
It is much easier to install tomato supports at planting time than after roots spread.
6. Water seedlings before transplanting
Water your seedlings a few hours before moving them. Moist root balls are easier to remove from pots and less likely to fall apart.
Avoid transplanting dry, wilted seedlings. Starting with hydrated plants reduces transplant shock.
7. Choose the right day and time
A cloudy day, calm evening, or mild morning is ideal for transplanting tomatoes. Hot afternoon sun can make the move harder on young plants.
If possible, avoid transplanting during:
- intense midday heat
- strong wind
- heavy rain
- cold snaps
Gentle conditions give seedlings more time to settle in.
8. Plant tomatoes deeply
Tomatoes are different from many vegetables because they can grow roots along buried stems. That means you can plant them deeper than they were growing in the pot.
Remove the lower leaves and bury part of the stem, leaving only the top sets of leaves above the soil. This encourages a stronger root system and a sturdier plant.
If your seedling is leggy, you can plant it extra deep or even lay part of the stem sideways in a shallow trench with the top curving upward.
9. Water well after planting
Right after transplanting, water thoroughly around the base of each plant. This helps settle the soil and remove air pockets around the roots.
For the first week or two, keep the soil evenly moist but not soggy. Tomatoes need consistent moisture while they establish.
A layer of mulch can help hold moisture and reduce soil splashing once the ground has warmed.
10. Protect plants if the weather changes
Spring weather can still surprise you after transplanting. If a cool night or late cold snap appears in the forecast, cover your plants.
You can protect tomato seedlings with:
- row cover
- garden cloches
- overturned buckets for the night
- frost blankets
Remove covers during the day if temperatures rise too much. Tomatoes need airflow and light.
Common Beginner Mistakes
Transplanting before the weather is truly warm
This is the most common mistake. A tomato seedling may look large enough, but if nights are still cold, it can sit still for weeks without growing.
Patience often beats planting early. A seedling transplanted a week later into warmer conditions usually catches up quickly.
Skipping hardening off
Plants raised indoors are not ready for full outdoor sun right away. Sudden exposure can bleach leaves, cause wilting, and stunt growth.
Even a few days of gradual adjustment is better than none, though a full 7 to 10 days is ideal.
Planting in compacted or soggy soil
Tomatoes need oxygen around their roots. Wet, heavy soil can suffocate roots and invite disease.
If soil clumps tightly in your hand and stays muddy, wait until it dries a bit before planting.
Letting seedlings become root-bound
If seedlings stay too long in small containers, roots begin circling the pot and competing for space. This stress can limit growth after transplanting.
If outdoor conditions are not ready yet, pot up seedlings into larger containers rather than leaving them cramped.
Planting too shallow
Many beginners transplant tomatoes at the same depth they grew in the pot. While that works, planting deeper often gives better results.
Burying part of the stem helps create a stronger root system, especially for tall or leggy seedlings.
Forgetting support
Tomato plants grow fast once they take off. If you wait too long to install cages or stakes, you may damage roots later.
Set supports in place when you transplant so the plant can grow into them naturally.
Best Tips for Success
Start with healthy seedlings
Choose stocky seedlings with thick stems and green leaves. Healthy young plants handle transplanting much better than weak, stretched seedlings.
If your seedlings look leggy, increase light and air circulation before planting them out.
Warm the soil if needed
If your spring is cool, cover the bed with black plastic or dark mulch for a few days before transplanting. This can help speed up soil warming.
In cool climates, raised beds and containers can also give tomatoes a better start.
Don’t rush fertilizer
A little compost at planting time is helpful, but too much nitrogen early on can push leafy growth at the expense of strong roots and later fruiting.
Focus first on establishment. Once plants begin active growth, you can follow a balanced feeding plan if your soil needs it.
Space plants properly
Good airflow reduces disease risk and makes plants easier to maintain. Crowded tomatoes stay wetter for longer after rain or watering.
Check the spacing recommendation for your variety, but many tomato plants need about 18 to 36 inches between them depending on type and support system.
Water consistently
After transplanting, uneven watering can stress plants and contribute to blossom end rot later. Try to keep soil evenly moist, especially during the first few weeks.
Deep watering is usually better than frequent shallow sprinkles.
Mulch after the soil warms
Mulch helps conserve moisture, reduce weeds, and keep soil from splashing onto leaves. Wait until the soil has warmed before applying a thick layer.
Straw, shredded leaves, or other clean organic mulch works well in a home vegetable garden.
Keep an eye on the forecast
Even after transplanting, pay attention to nighttime temperatures for a couple of weeks. Young tomato plants are more vulnerable than mature ones.
Having a cover ready can save a lot of stress.
Recommended Supplies or Tools
You do not need fancy equipment to transplant tomatoes successfully. A few simple supplies make the job easier.
Helpful tools and materials include:
- seedling trays or small pots
- larger pots for potting up if needed
- hand trowel
- compost
- watering can or gentle hose nozzle
- tomato cages, stakes, or trellis
- mulch such as straw or shredded leaves
- plant labels
- row cover or frost cloth
- soil thermometer for checking spring soil temperatures
Optional but useful items:
- kneeling pad for comfort
- diluted seaweed solution for transplanting stress, if you already use it
- bucket or tray for carrying seedlings outside during hardening off
Frequently Asked Questions
Can I transplant tomato seedlings before the last frost?
It is not recommended unless you have strong protection and a very close eye on the forecast. Tomatoes are sensitive to frost and cold soil, so waiting until after the last frost is the safer choice.
How big should tomato seedlings be before transplanting outside?
A good target is 6 to 10 inches tall with several sets of true leaves and a sturdy stem. More important than exact height is that the plant looks healthy, stocky, and well-rooted.
What happens if I transplant too early?
Tomato seedlings may stop growing, develop stress coloring, wilt, or suffer cold damage. Even if they survive, they often take longer to recover than seedlings planted later in warmer conditions.
Should I bury the stem when transplanting tomatoes?
Yes, in most cases. Tomatoes can form roots along buried stems, so planting deeply helps build a stronger root system.
How long does transplant shock last?
Mild transplant shock may last a few days. If conditions are warm and the plant was hardened off properly, most seedlings recover quickly and begin putting on new growth within a week or two.
Final Thoughts
If you’ve been asking when should I transplant tomato seedlings, the best answer is to look at both the plant and the weather. Wait until frost danger has passed, nights are consistently mild, the soil has warmed, and your seedlings have been hardened off.
For most beginners, success comes from patience more than perfect timing. A sturdy seedling planted into warm soil will almost always outperform one that was rushed into the garden too early.
Take it one step at a time, trust the signs your seedlings are giving you, and don’t worry if your first season is a learning experience. Tomatoes are generous plants, and with the right start, they can reward you with a long, delicious harvest.