How to Build an Indoor Hydroponic Garden: A Beginner-Friendly Step-by-Step Guide
Affiliate Disclosure: This article contains affiliate links. If you make a purchase through one of them, we may earn a small commission at no extra cost to you. We only recommend products we genuinely believe will help your garden thrive.
Want to grow fresh herbs and greens at home without digging up your yard or buying bags of potting mix? Learning how to build an indoor hydroponic garden is a practical way to grow vegetables in a small space, right on a shelf, counter, or spare table.
The good news is that you do not need a high-tech setup to get started. With a few basic supplies and a simple plan, beginners can build a productive indoor hydroponic garden that is easy to manage and fun to watch grow.
Why This Topic Matters
Indoor hydroponic gardening makes homegrown food possible even if you do not have outdoor space. If you live in an apartment, deal with poor soil, or want to grow through winter, hydroponics gives you another option.
It is also a great beginner project because you can start small. A simple system can grow lettuce, basil, spinach, cilantro, and other compact crops without needing a full greenhouse or a large budget.
Another reason this matters is control. Indoors, you can manage light, water, and temperature more easily than in an outdoor garden. That usually means fewer surprises from weeds, heavy rain, or sudden cold snaps.
Hydroponics can sound complicated at first, but the basic idea is simple: plants grow with their roots in water that contains dissolved nutrients. Once you understand that foundation, the rest becomes much easier.
Quick Answer
To build an indoor hydroponic garden, choose a simple system like deep water culture or Kratky, place it in a bright indoor spot, add a grow light if needed, fill a reservoir with water and hydroponic nutrients, place seedlings in net pots with an inert growing medium, and monitor light, water level, and nutrient strength regularly.
For beginners, the easiest path is to start with:
- A small container or reservoir
- Net pots
- Hydroponic nutrient solution
- A growing medium such as clay pebbles or coco coir plugs
- Leafy green or herb seedlings
- A basic LED grow light
Start with easy crops first. Good beginner choices include:
- Lettuce
- Basil
- Mint
- Spinach
- Arugula
- Green onions
- Cilantro

A basic DWC hydroponic system requires just a few affordable parts and takes under an hour to build.
Step-by-Step Guide
1. Choose the right type of hydroponic system
If you are new to hydroponics, keep it simple. The two easiest systems for beginners are the Kratky method and deep water culture (DWC).
Kratky is a passive system. The plant sits above a nutrient reservoir, and the roots grow down into the water as the level slowly drops. It is low-cost and easy to assemble.
DWC is also beginner-friendly, but it uses an air pump and air stone to keep the water oxygenated. This adds one more piece of equipment, but it can support healthy growth and is a good next step if you want a more active system.
For a first indoor hydroponic garden, a small DWC tote or a few Kratky jars are both excellent choices.
2. Pick a good indoor location
Your plants need steady light and a stable temperature. A kitchen corner, utility shelf, basement grow rack, or sunny room can work well.
Look for a location that has:
- Easy access to electricity if you use a grow light or air pump
- A nearby water source for refilling
- Good airflow
- Protection from pets and curious children
- Temperatures roughly between 65 and 75°F for most greens and herbs
A sunny window may help, but most indoor growers get more reliable results with a grow light. Window light alone is often not enough for steady growth, especially in winter.
3. Decide what you want to grow
Choose crops that stay compact and grow quickly. This gives you faster success and fewer problems.
The best first crops are leafy greens and herbs because they do not need a large root zone or heavy feeding. Fruiting plants like tomatoes and peppers are possible, but they need more light, more nutrients, more support, and more patience.
For your first setup, try one or two of these:
- Loose-leaf lettuce
- Basil
- Spinach
- Kale
- Bok choy
- Parsley
4. Gather your supplies
A beginner indoor hydroponic garden does not need dozens of parts. You can build a small system with a short shopping list.
Basic supplies include:

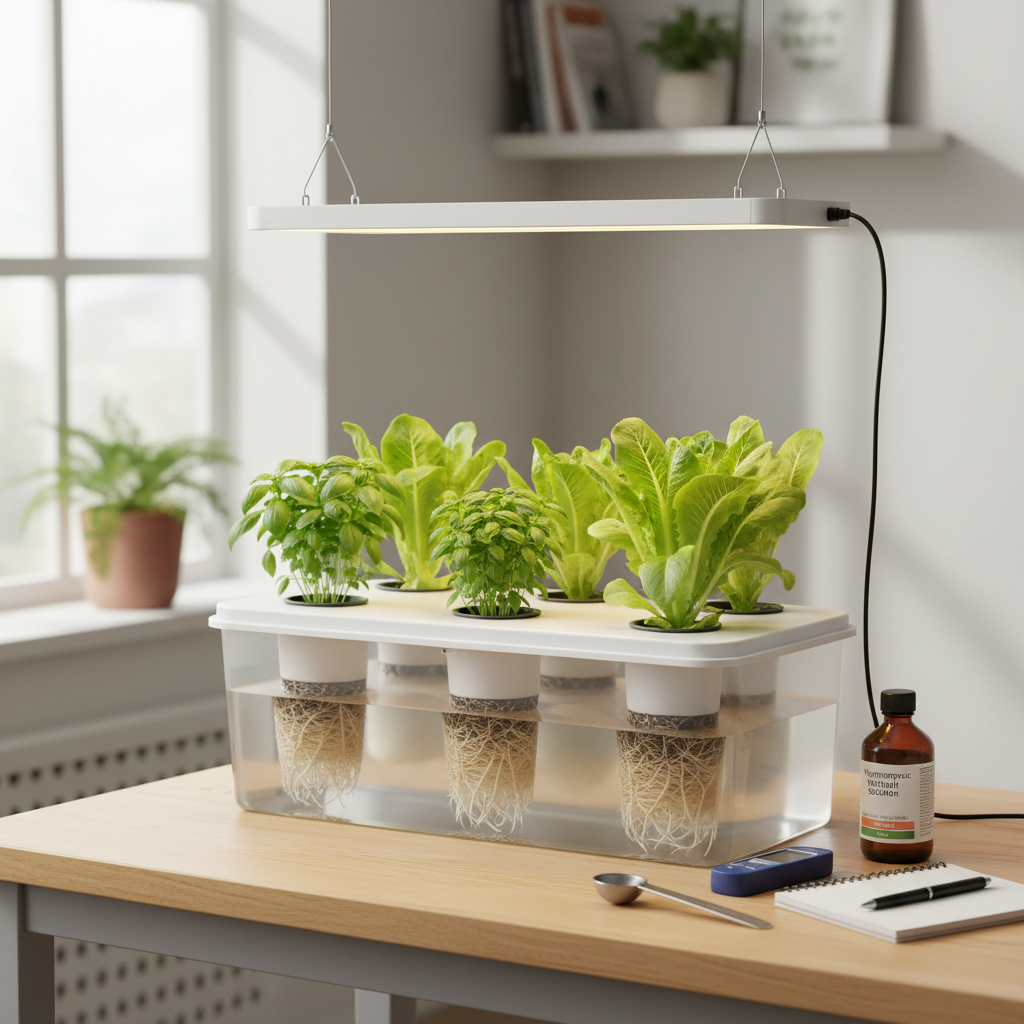
Clay pebbles in net pots support plant roots while allowing full contact with the nutrient solution below.
- Opaque container or reservoir with lid
- Net pots that fit into the lid holes
- Hydroponic nutrients
- Growing medium such as clay pebbles, rockwool, or starter plugs
- Seeds or seedlings
- LED grow light
- pH test kit or pH meter
- Measuring spoon or syringe for nutrients
If you are building a DWC system, add:
- Air pump
- Air stone
- Airline tubing
Opaque containers are important because they block light. Light hitting the nutrient solution encourages algae growth, which can create extra maintenance.
5. Build the reservoir and plant holder
Now it is time to assemble the system. If you are using a storage tote, drill or cut holes in the lid to fit your net pots.
Space the holes so leaves have room to spread as the plants grow. For lettuce and herbs, 4 to 6 inches apart is often enough in a small home setup.
Then fill the net pots with your chosen growing medium. If you are starting from seed, place the seed in a starter plug or small cube first, then transfer it into the net pot once it sprouts.
6. Mix the nutrient solution correctly
Hydroponic plants do not get nutrients from soil, so the water must provide what they need. Always use nutrients made for hydroponic gardening rather than regular fertilizer.
Follow the label directions carefully. It is usually better for beginners to start at a mild or half-strength feeding rate, especially for young seedlings.
Here is a simple process:
- Fill the reservoir with water.
- Add hydroponic nutrients according to the product instructions.
- Stir or mix well.
- Check the pH.
- Adjust the pH if needed.
For many herbs and greens, a pH between about 5.5 and 6.5 is a useful range. You do not need to obsess over perfection, but checking pH regularly helps plants absorb nutrients properly.
7. Set the water level
For a DWC setup, the bottom of the net pot should sit just above or barely touch the nutrient solution at first. This encourages the roots to grow downward while still getting moisture.
For a Kratky setup, the water level starts high enough to reach the young roots. As the plant grows, the level drops and creates an air gap, which helps provide oxygen to the roots.
If you are using DWC, connect the air pump and air stone before adding plants. You should see a gentle stream of bubbles in the reservoir.
8. Add your plants
You can start with either seeds or seedlings. Seedlings are easier for beginners because they give the system a head start.
If transplanting, handle roots gently and avoid packing the medium too tightly. The roots need access to both moisture and air.
Once planted, place the lid securely on the reservoir and make sure each net pot sits firmly in place.
9. Install and set your grow light
Light is one of the biggest factors in indoor success. Without enough light, plants become weak, stretched, and pale.
Hang or position the grow light above the plants according to the manufacturer’s guidance. As a general rule, keep the light close enough for strong growth but not so close that it overheats or scorches the leaves.
Many leafy greens and herbs do well with about 12 to 16 hours of light each day. A simple outlet timer makes this much easier and keeps your routine consistent.
10. Monitor the system each week
Hydroponics works best when you pay attention to small changes before they become big problems. A quick weekly check is usually enough for a simple home garden.
Check these things regularly:
- Water level in the reservoir
- pH of the solution
- Nutrient strength, if you have an EC or TDS meter
- Leaf color and plant growth
- Root health
- Light height and timer schedule
Healthy roots are usually white or cream-colored and smell fresh. If roots look dark, slimy, or smell bad, something is off and the reservoir likely needs attention.
11. Refresh nutrients and clean the system

An air stone and pump keep oxygen levels high in your reservoir — essential for healthy root growth.
Top off the reservoir with water as plants use it. Every couple of weeks, or according to your nutrient schedule, replace the old solution with fresh nutrient mix.
It also helps to clean the container, lid, and tubing from time to time. A clean setup reduces algae, salt buildup, and disease pressure.
A simple routine might look like this:
- Check water level every 2 to 3 days
- Top off with water as needed
- Test pH weekly
- Replace nutrient solution every 2 to 3 weeks
- Wipe down and clean parts between plantings
12. Harvest often and replant
One of the best parts of indoor hydroponics is how quickly you can harvest greens and herbs. Many crops can be picked leaf by leaf instead of all at once.
Frequent harvesting encourages some plants to keep producing. Once a crop slows down or becomes crowded, start new seedlings so your indoor garden stays productive.
Common Beginner Mistakes
Most hydroponic problems come from trying to do too much too soon. Starting with a manageable system makes learning much easier.
Here are some common mistakes to avoid:
Choosing difficult crops first
Large fruiting plants are exciting, but they are not the easiest place to begin. Start with lettuce or herbs, then move on to tomatoes or peppers later.
Using clear containers
Transparent jars and bins let light hit the nutrient solution. That often leads to algae growth, messy reservoirs, and extra maintenance.
Overfeeding plants
More nutrients do not always mean faster growth. Too much fertilizer can stress young plants and cause leaf burn.
Ignoring pH
A plant can sit in nutrient-rich water and still struggle if the pH is out of range. Checking pH regularly helps prevent nutrient lockout.
Giving plants weak light
This is one of the biggest indoor issues. If your seedlings are tall, floppy, or leaning hard toward the light, they probably need stronger or closer lighting.
Forgetting airflow and cleanliness
Stale air, dirty reservoirs, and old nutrient solution can invite problems. A tidy setup with some airflow makes a big difference.
Best Tips for Success
Hydroponics becomes much less intimidating when you keep the process simple and repeatable. A few smart habits can help you avoid frustration.
Start small
Build one small system first. It is easier to learn on two to four plants than on a whole shelf full of crops.
Grow what you actually eat
If your family uses basil, lettuce, and green onions every week, start there. Harvesting foods you enjoy makes the project feel useful right away.
Keep a basic garden log
Write down the date you planted, what nutrients you used, and any changes you notice. A simple notebook helps you spot patterns and improve faster.
Use a timer for lights
Consistency matters indoors. A timer removes guesswork and gives plants a steady day-night rhythm.
Watch the plants, not just the schedule
Schedules are helpful, but plants give the real feedback. Pale leaves, drooping growth, or slow development usually mean it is time to check light, pH, water level, or nutrients.
Stagger new plantings
Instead of planting everything on one day, start a few new seeds every couple of weeks. This creates a more steady supply of fresh greens.
Recommended Supplies or Tools
You do not need every gadget on day one, but a few well-chosen tools can make indoor hydroponics easier and more reliable.
Must-have basics

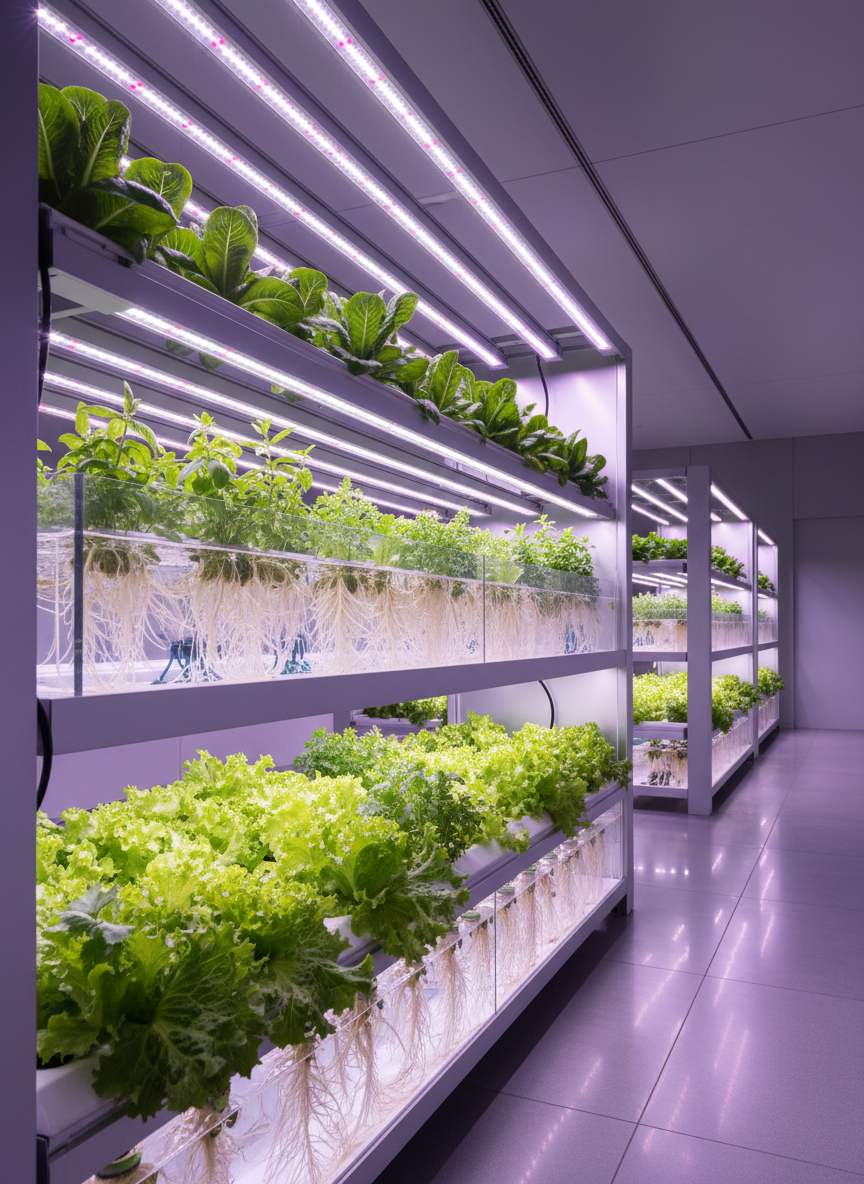
A finished DWC system with thriving plants and dense white root systems shows the setup is working.
- Opaque reservoir or food-safe storage tote
- Net pots
- Hydroponic nutrient solution
- Starter plugs or growing medium
- LED grow light
- Seeds or seedlings
- Measuring tools for mixing nutrients
Very helpful extras
- pH meter or pH test kit
- pH up and pH down solution
- Timer for grow lights
- Air pump and air stone for DWC systems
- Small fan for airflow
- EC or TDS meter for tracking nutrient strength
Good beginner setup idea
If you want a practical first project, try this simple combination:
- A small opaque tote with a lid
- Two to four net pots
- Lettuce or basil seedlings
- Clay pebbles or starter plugs
- A basic full-spectrum LED grow light
- Hydroponic nutrients for leafy greens
- A timer and pH test kit
That is enough to learn the fundamentals without overcomplicating the process.
Frequently Asked Questions
What is the easiest indoor hydroponic system for beginners?
The Kratky method is often the simplest because it does not require pumps or moving parts. Deep water culture is also beginner-friendly and offers more active root aeration if you are comfortable adding an air pump.
Do indoor hydroponic gardens need sunlight?
They need light, but it does not have to come from the sun. Many indoor hydroponic gardens do best under LED grow lights because the light is more consistent than a window, especially during short winter days.
What vegetables grow best in a small indoor hydroponic garden?
Leafy greens and herbs are the easiest starting point. Lettuce, basil, spinach, kale, arugula, cilantro, and green onions are all good choices for compact indoor systems.
How often do I need to change the water in a hydroponic system?
You will usually top off the reservoir with water as the level drops and replace the nutrient solution every 2 to 3 weeks. The exact timing depends on plant size, system type, and the nutrients you use.
Recommended Products
Looking for the right gear to get started? We've curated our top picks for sustainable vegetable gardening — from raised beds and grow lights to seed-starting kits and organic fertilizers — on our Recommended Products page.
Ready to Start?
If you're ready to gear up, check out our recommended raised beds and grow lights on Amazon — beginner-approved and built to last.
Ready to Start?
If you're ready to gear up, check out our recommended raised beds and grow lights on Amazon — beginner-approved and built to last.
Ready to Start?
If you're ready to gear up, check out our recommended raised beds and grow lights on Amazon — beginner-approved and built to last.
Ready to Start?
If you're ready to gear up, check out our recommended raised beds and grow lights on Amazon — beginner-approved and built to last.
Ready to Start?
If you're ready to gear up, check out our recommended raised beds and grow lights on Amazon — beginner-approved and built to last.
Ready to Start?
If you're ready to gear up, check out our recommended raised beds and grow lights on Amazon — beginner-approved and built to last.
Final Thoughts
If you have been wondering how to build an indoor hydroponic garden, the easiest answer is to start small, stay consistent, and grow simple crops first. You do not need a perfect setup to begin, and you do not need to know everything before planting your first basil or lettuce seedling.
A basic indoor hydroponic garden can teach you a lot in a short time. Once you see healthy roots, new leaves, and your first harvest, the process feels much more approachable.
Begin with one simple system, keep notes, and make small improvements as you go. That steady, beginner-friendly approach is often the best way to build confidence and grow fresh food at home year-round.